Planioはコラボレーションとプロジェクト管理ツールの強力な組み合わせです。高い柔軟性を持ち、職場のほぼすべての状況に適応できます。
Planioのようなツールを会社で使った経験がない場合は、簡単な機能からスタートし、段階的に様々な要素を取り入れていくことをお勧めします。
複雑なことは嫌いですよね。私たちもそうです。これからPlanioを始めようとする方へ、思い切ったアプローチをとってみませんか。 私たちはPlanioを必要最低限まで削ぎ落とし、一番シンプルな姿をお見せします。
オプション機能などは後ほど必要な時に紹介します。全てを省略することは決してしませんので、ご安心ください。
はじめに、たった一つのプロジェクトからスタートすることをお勧めします。プロジェクトは複数ではなく、最初は一つだけにしてください。もちろん、Planioを使って数多くの物事を管理できますし、お好きなだけコンテンツを作成できます。しかし、最初は一つのプロジェクトにしてください。必要であれば後で追加することもできます。
早速非常にシンプルなプロジェクトを作りましょう。
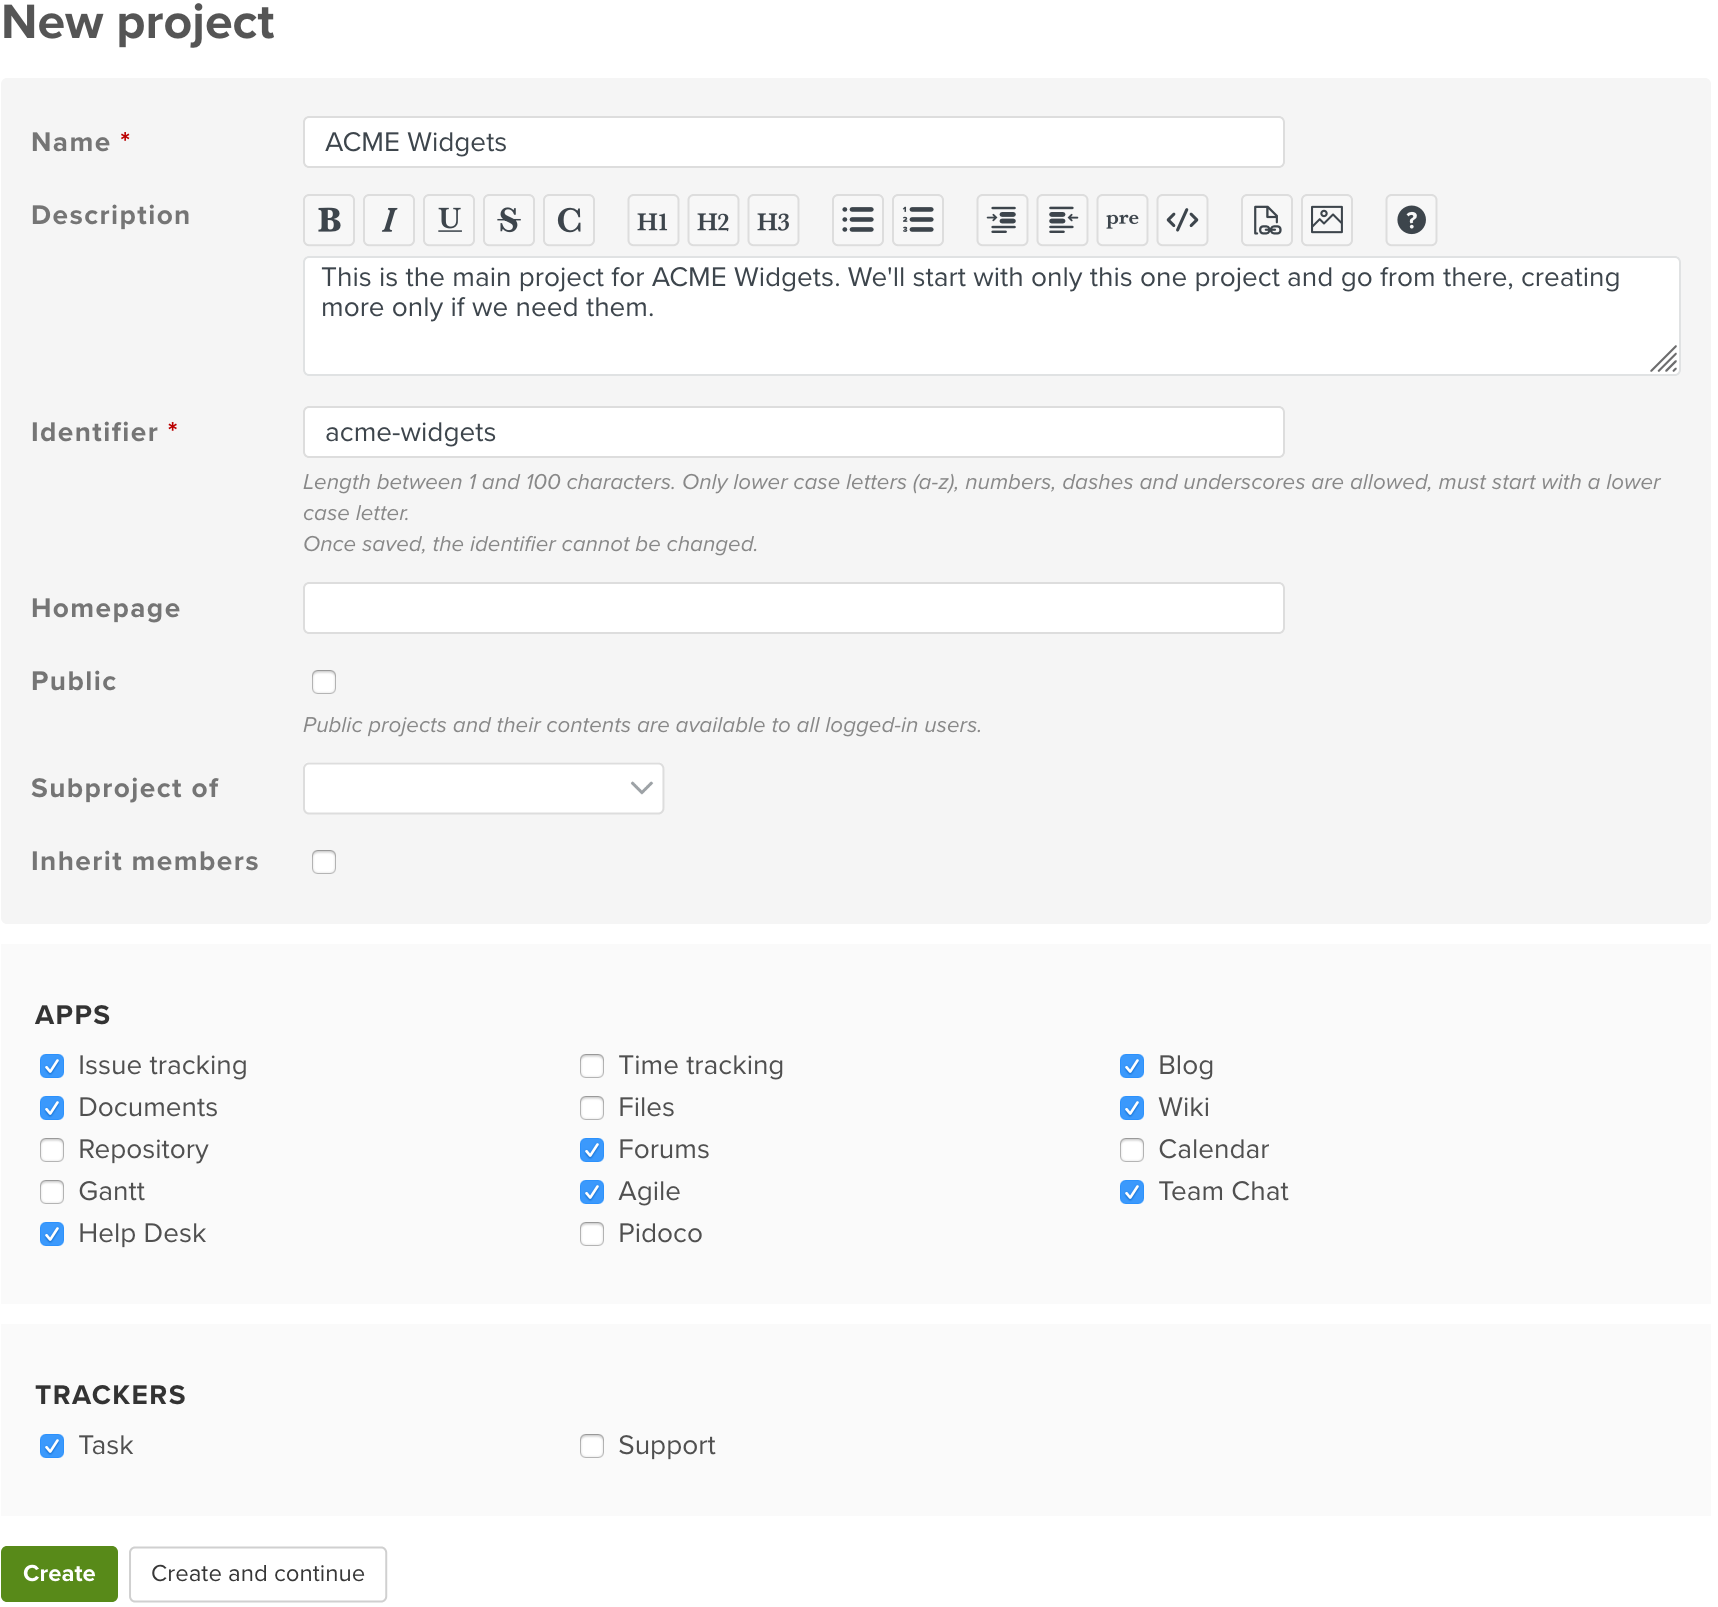
すでに同僚をPlanioに招待している場合は必ずメンバータブをクリックして新しいプロジェクトに追加してください。役割は管理者を選択してください。まだ誰も招待していなくても心配ありません、あとで招待する方法を説明します。
トラッカーは、受け取った請求書の処理や発注の承認のような、業務プロセスにおいて事前に定義された手順にしたがって繰り返し実行するタスクに対して、独自のワークフローを定義できます。
我々は極力シンプルと言いましたが、あなたが望んでいるのはこんなものではないですよね。
ロールはアクセス権限を管理できる強力な手段です。プロジェクトの中で「誰が何をできるか」をきめ細かく制御できます。
私たちの仮説: 今はロールを忘れましょう。
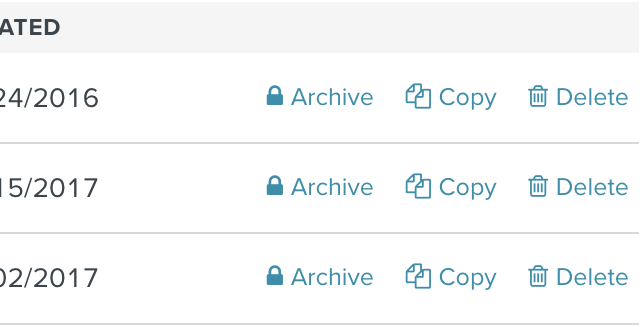
コツがわかりましたか?今から要らないものをどんどん削除していきます。
いい感じになりましたね!
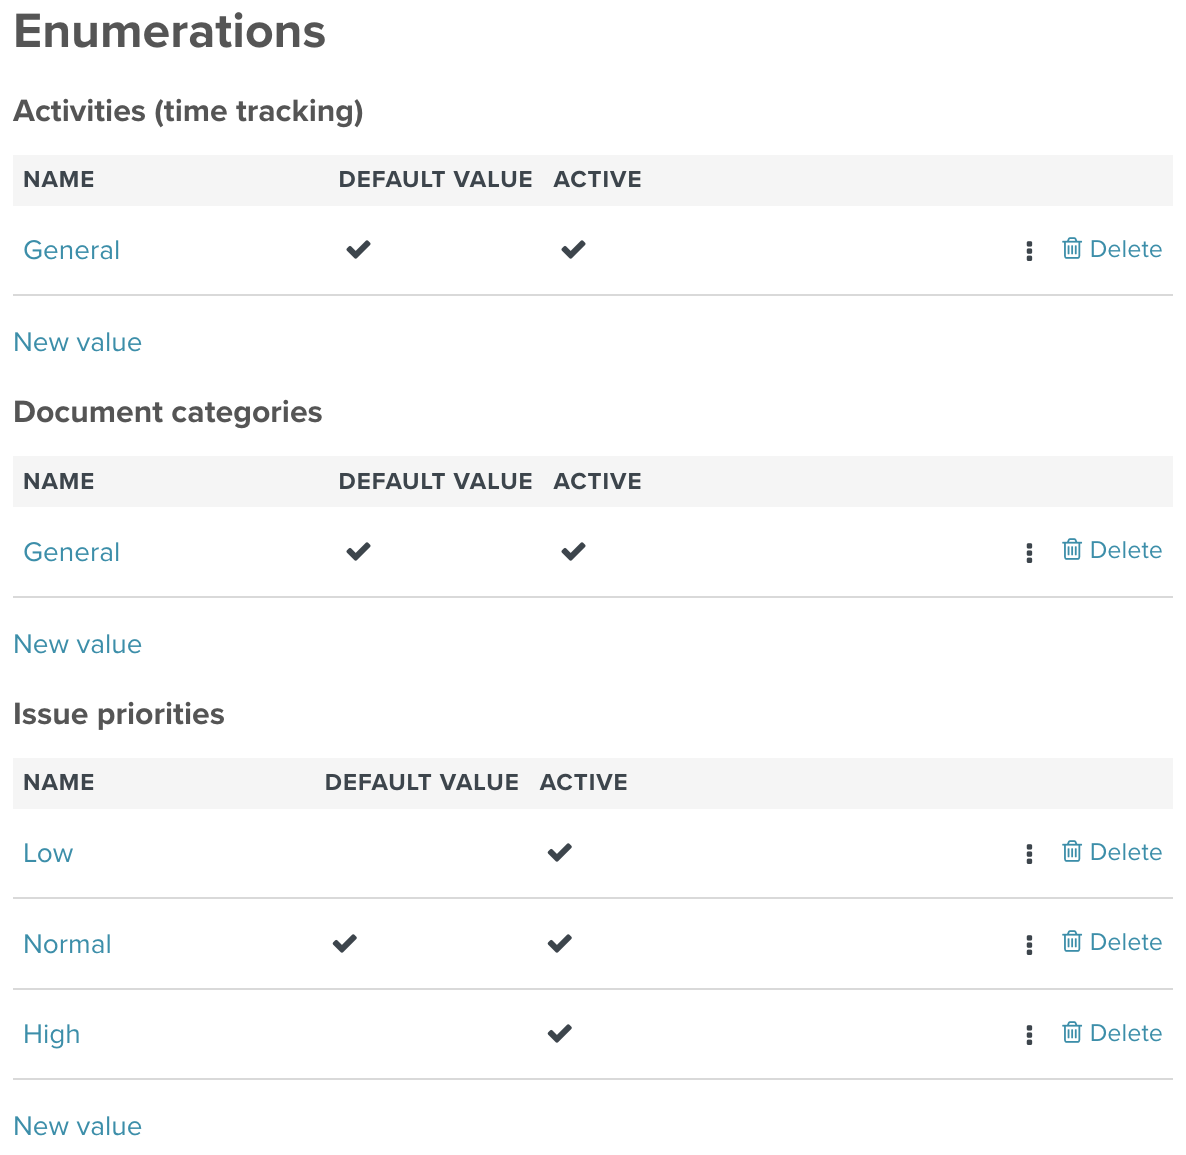
単純なタスクに対してトラッカー、カテゴリ、対象バージョン、進捗率を選択するのは面倒だと感じますよね?それらを取り除き、ワークフローをシンプルにしましょう。

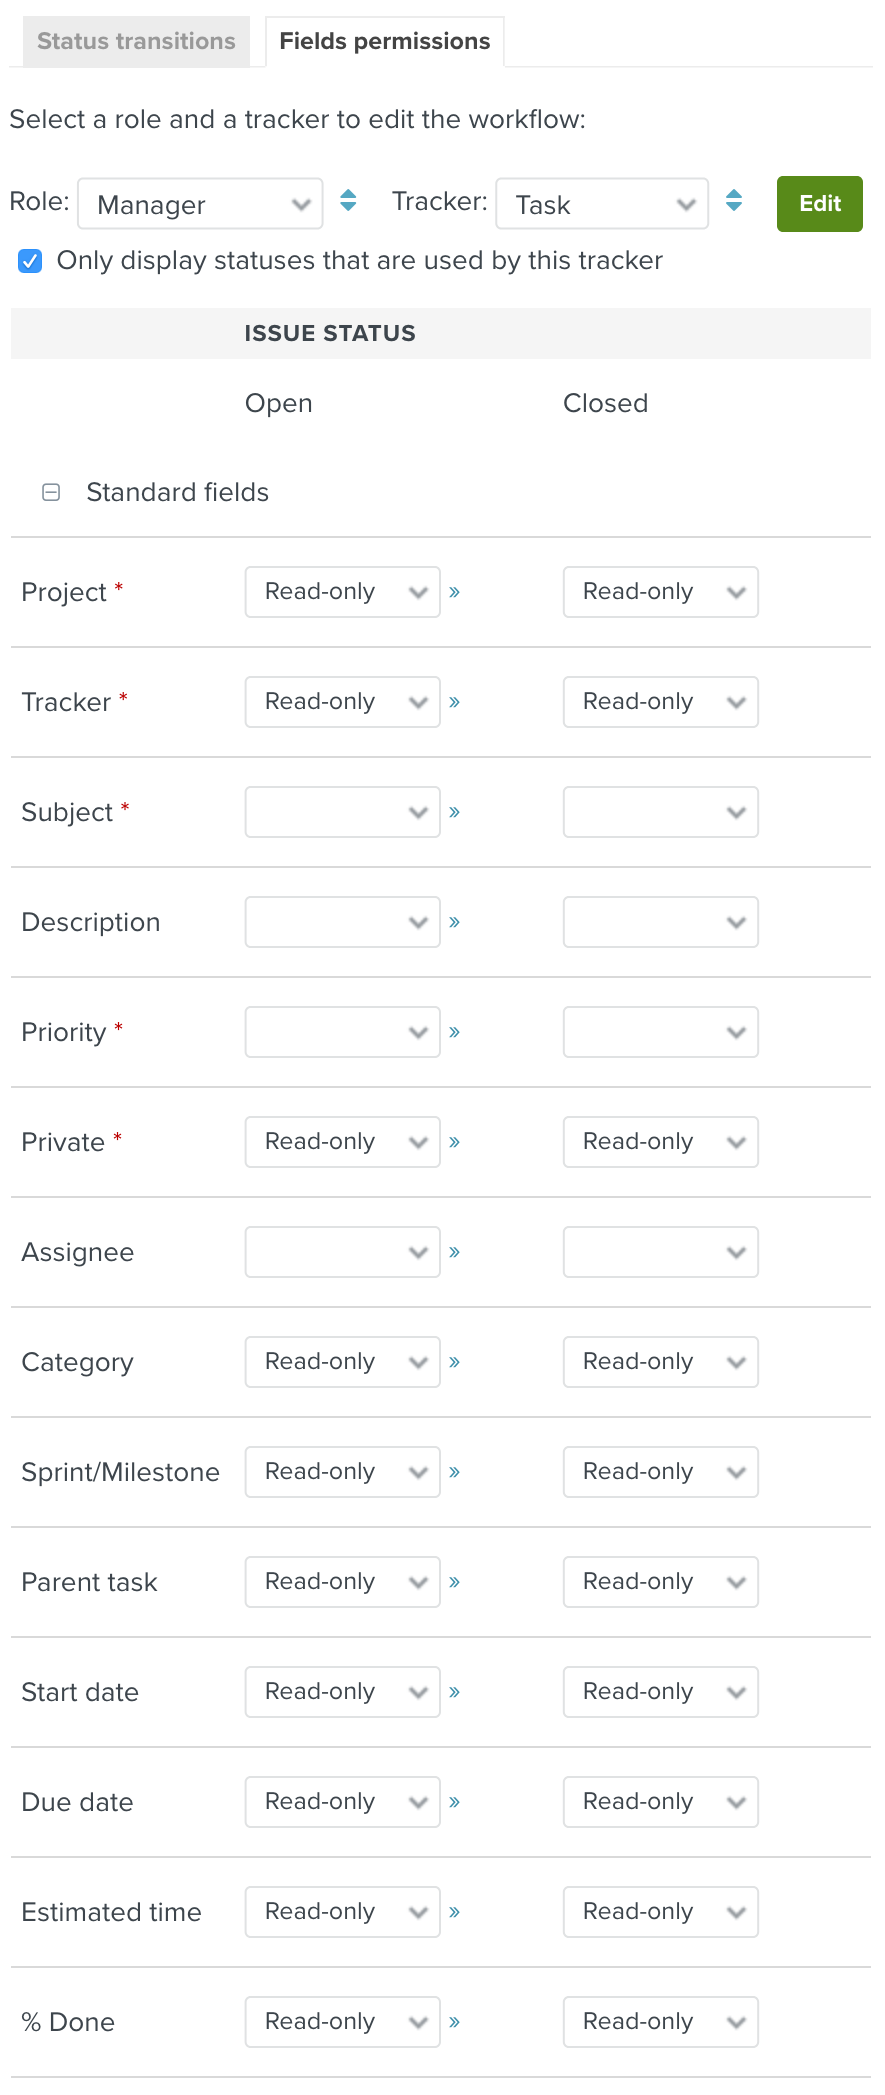
出来ましたか?フィールドを読み取り専用に設定することで、実際にはそれらをチケットの作成や更新に使用されるフォームから削除しました。これでフォームがはるかにシンプルで記入しやすくなります。
フィールドを見逃すことを心配していますか?安心してください。読み取り専用から空の選択肢に切り替えるだけで、フィールドはフォームに再び表示されます。
以上。出来ましたね。最もシンプルなPlanioへようこそ。
次は何をしたらいいですか?以下をご参考まで。
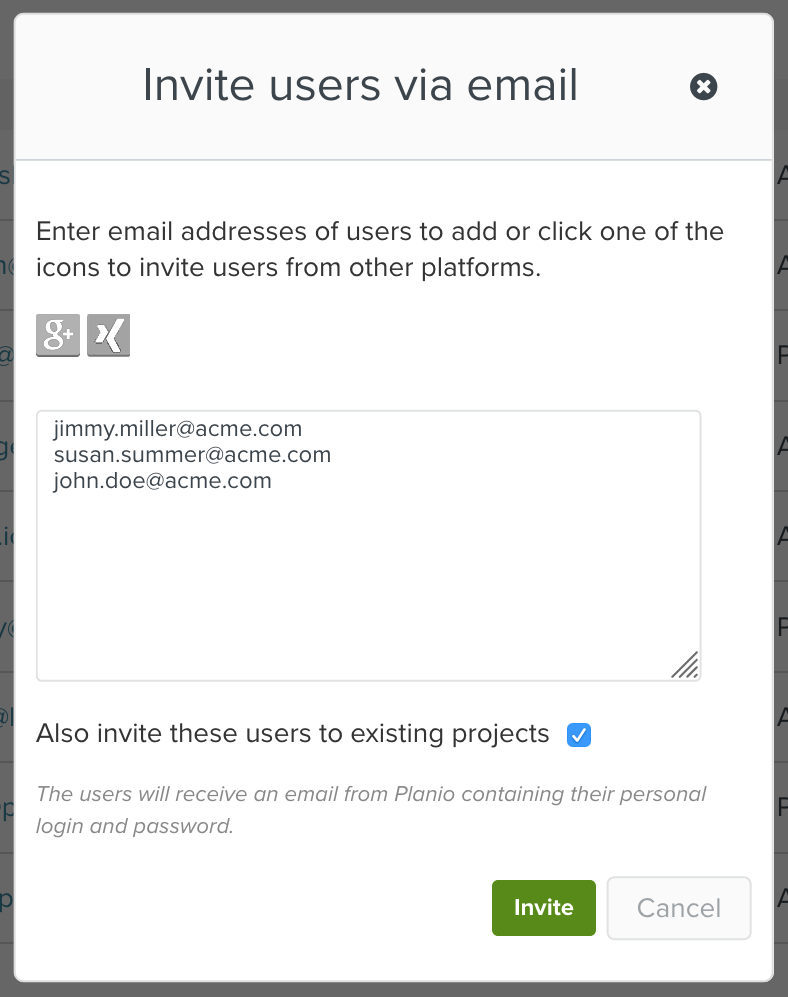
まだチームのメンバーたちをPlanioに招待していなければ、招待してください。
画面上部のメニュープロジェクトを経由して自分のプロジェクトに移動し、様々なセクションを確認してみてください。
これらは何ができるでしょう。
Planioを日常生活に取り入れる最善の方法は何でしょうか? 実は極めてシンプルなのです。すべては、簡単に取り入れられる一つの習慣にかかっています。それは メールを送る前によく考えてください です。
反射的に電子メールクライアントを開いて、同僚全員をCCに追加していませんか?もうそんなことはしないでください!
今あなたが書いている文面について考えてみてください。仕事を終わらせたい場合は、チケットを作成してください。 何かをアナウンスしたい場合はニュースを使用してください。共有したいPDFファイルがあるならば、それを文書にアップロードしてください。会議の議事録を作成したり、休暇申請を送信するための 新しいワークフローを説明したい場合は、Wikiを更新してください。 最後に、素晴らしいアイデアを思いつき、フィードバックが必要な場合は、フォーラムに投稿してください。
同僚にも同じ行動を促し、メールの量を減らし、そしてより良い構造化された環境で信じられないほどの生産性向上を楽しみましょう!
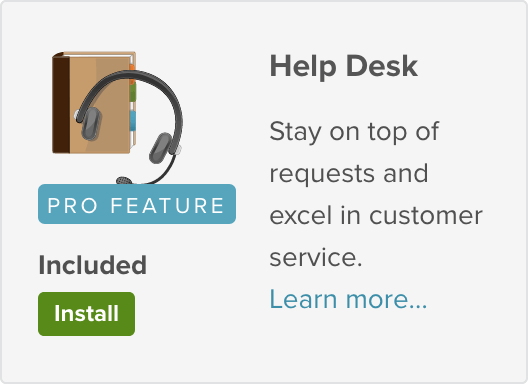
Planio Help Desk は、より良い顧客サービスを提供するのに役立ちます。顧客とのすべてのやり取りを一箇所に集約することで、サポートの質問全体の概要を把握できます。
まず自分のPlanioにログインして、カスタマサポート用のプロジェクトを作成しましょう。
専用のプロジェクトをお勧めします。もし多言語対応を提供しているならば、言語種類に応じてプロジェクトを分けた方が最善です。
まだHelp Desk App をインストールしていない場合は、モジュールからインストールしてください。
インストールが完了したら、サポート用のメールアドレスを設定する必要があります。
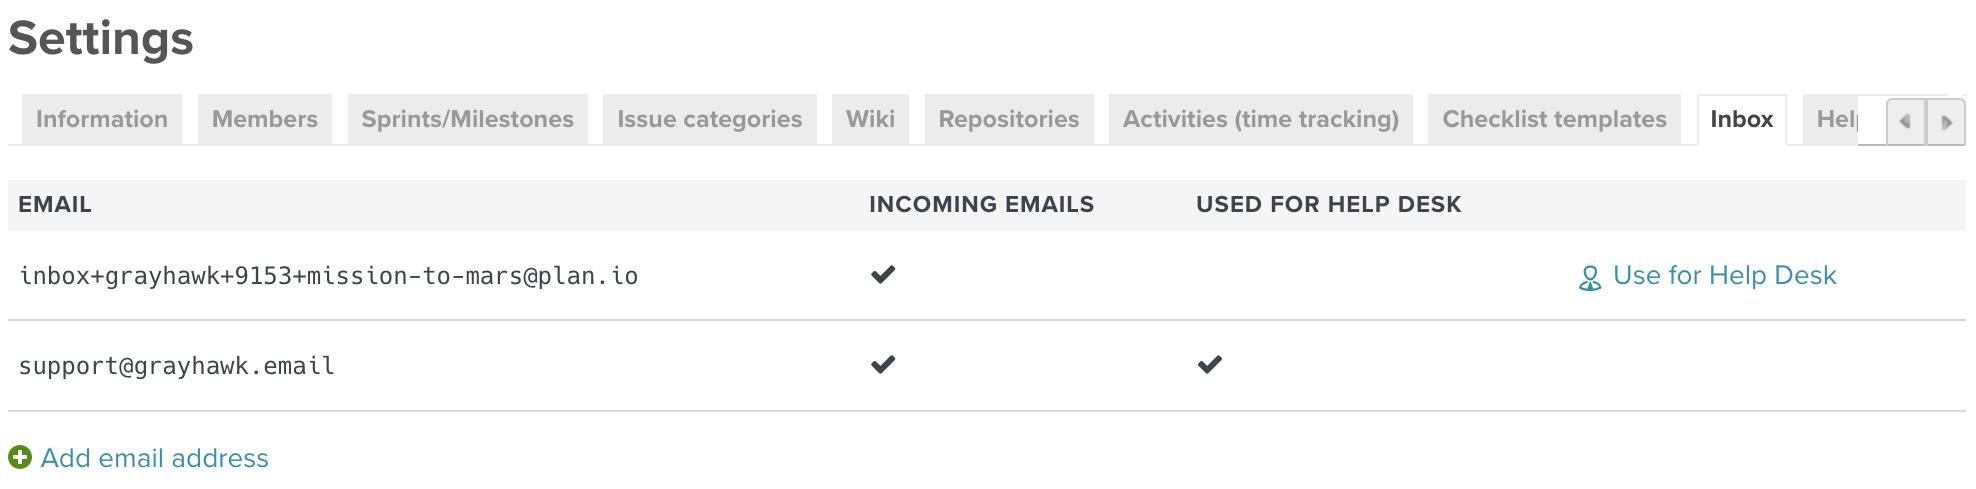
「設定」画面で「Inbox」ボタンをクリックしてください。 メールアドレスの追加 に従い、メールアドレス フィールドにサポート用の電子メールアドレスを入力します。あなたが所有する任意の電子メールアドレスを使用できます。Planioの例では、support (at) plan.io を使用しています。
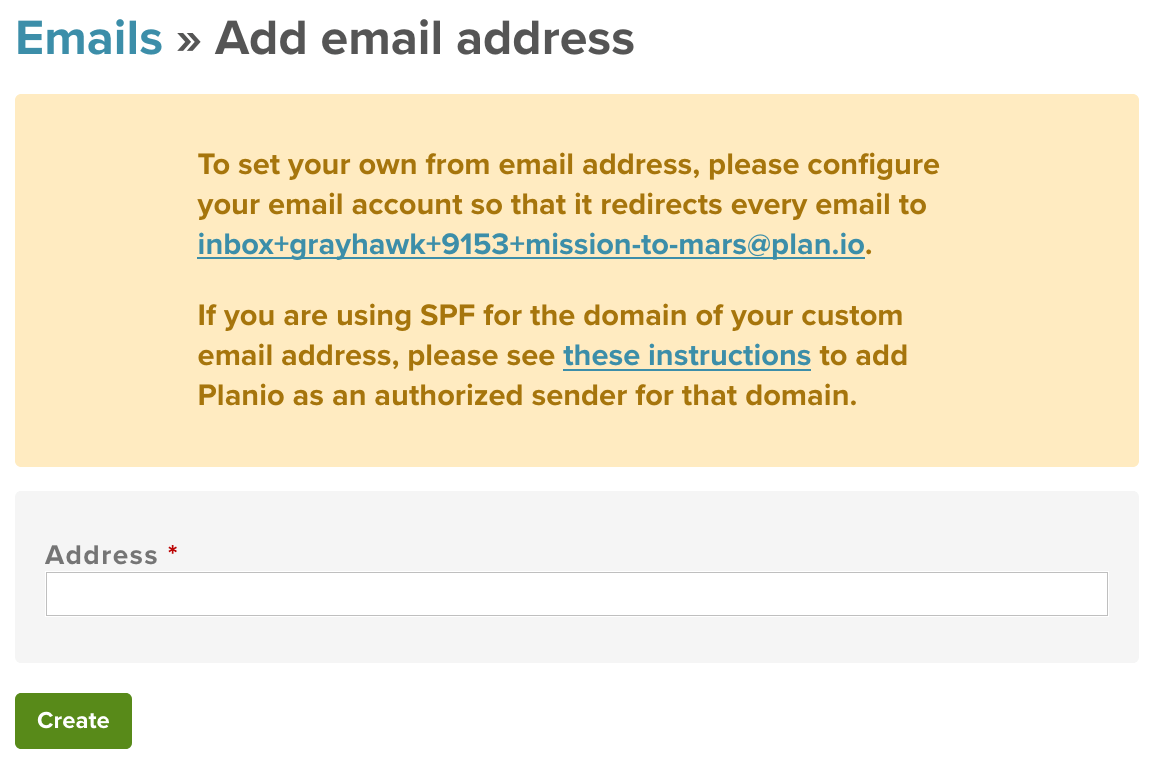
次はメールが このアドレスに転送される* よう設定しなければなりません。このボックス内のアドレス宛に送られたメールは、"From email address" フィールドのすぐ下に表示される各自のPlanio Inboxのメールアドレスに転送される必要があります。GSuite (旧 Google Apps) および Godaddy や ENOM などの大手ドメインレジストラでこれを行う方法に関するチュートリアルへのリンクは次の通りです。
セットアップ後、使用できるまで数分かかります。
転送が正常に確認されたら、Help Deskで新しいアドレスを有効にして使用できます。
サポート用メールアドレスにメールを送信すると、プロジェクト内ではチケットとして反映されます。

チケット タブをクリックするとチケットを表示できます。件名はチケットの題名になり、メール本文は「説明」に設定されています。
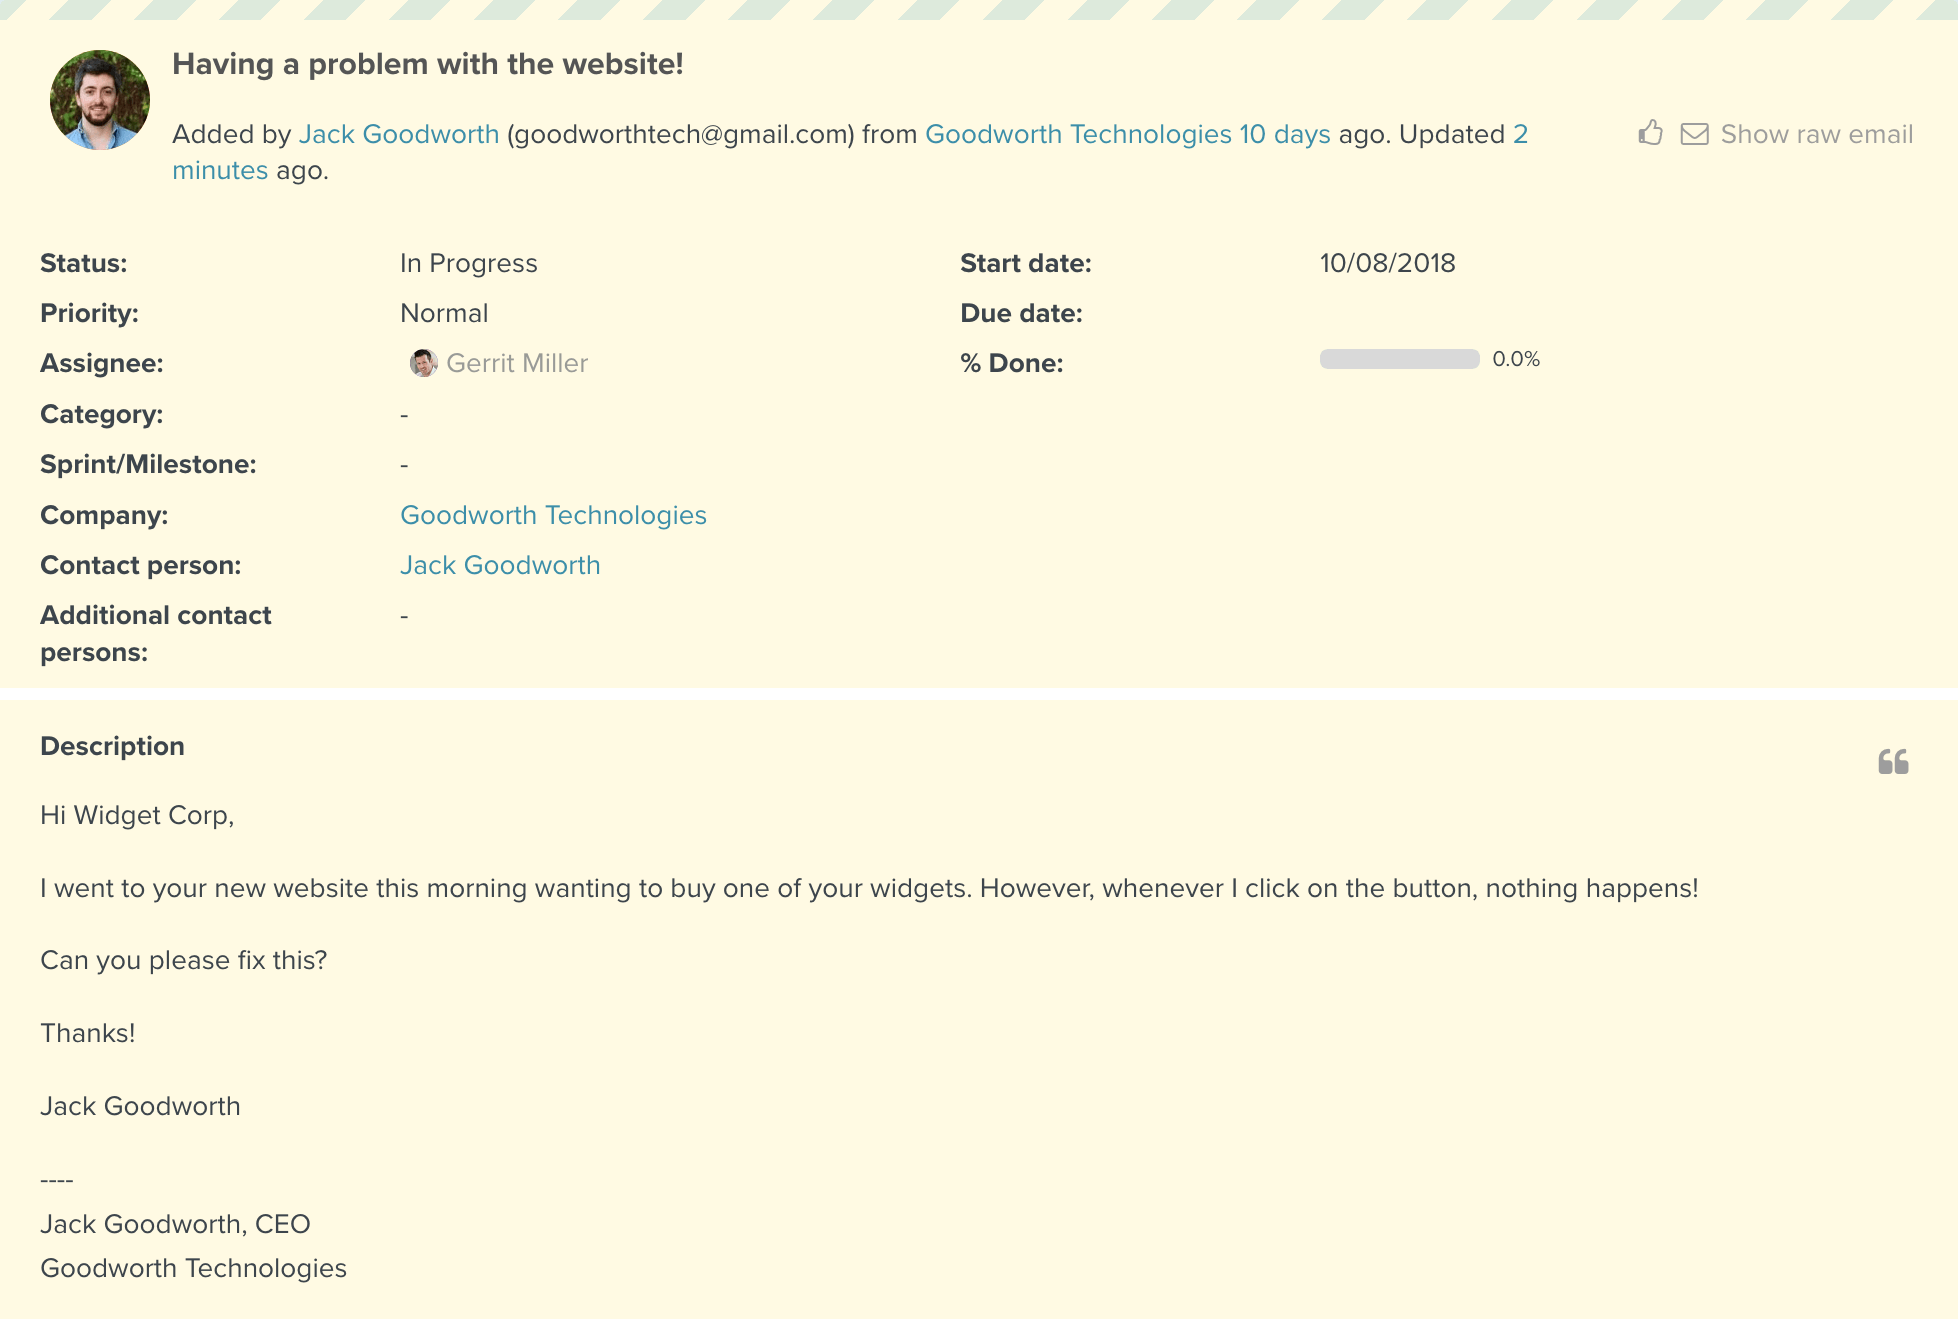
顧客がPlanioに登録されていないメールアドレスを使用して送信した場合、そのメールアドレスが「連絡先」に新しい顧客として追加されるため、その人とのすべてのやり取りを追跡できるようになります。つまり、Planio内で顧客との関係を自動的に管理できるようになります。
Planioは、顧客に受信確認の自動メールも送信します。
編集をクリックして、コメントまでスクロールダウンしてください。「外部ノート」にチェックを入れて、メール本文を書きましょう。
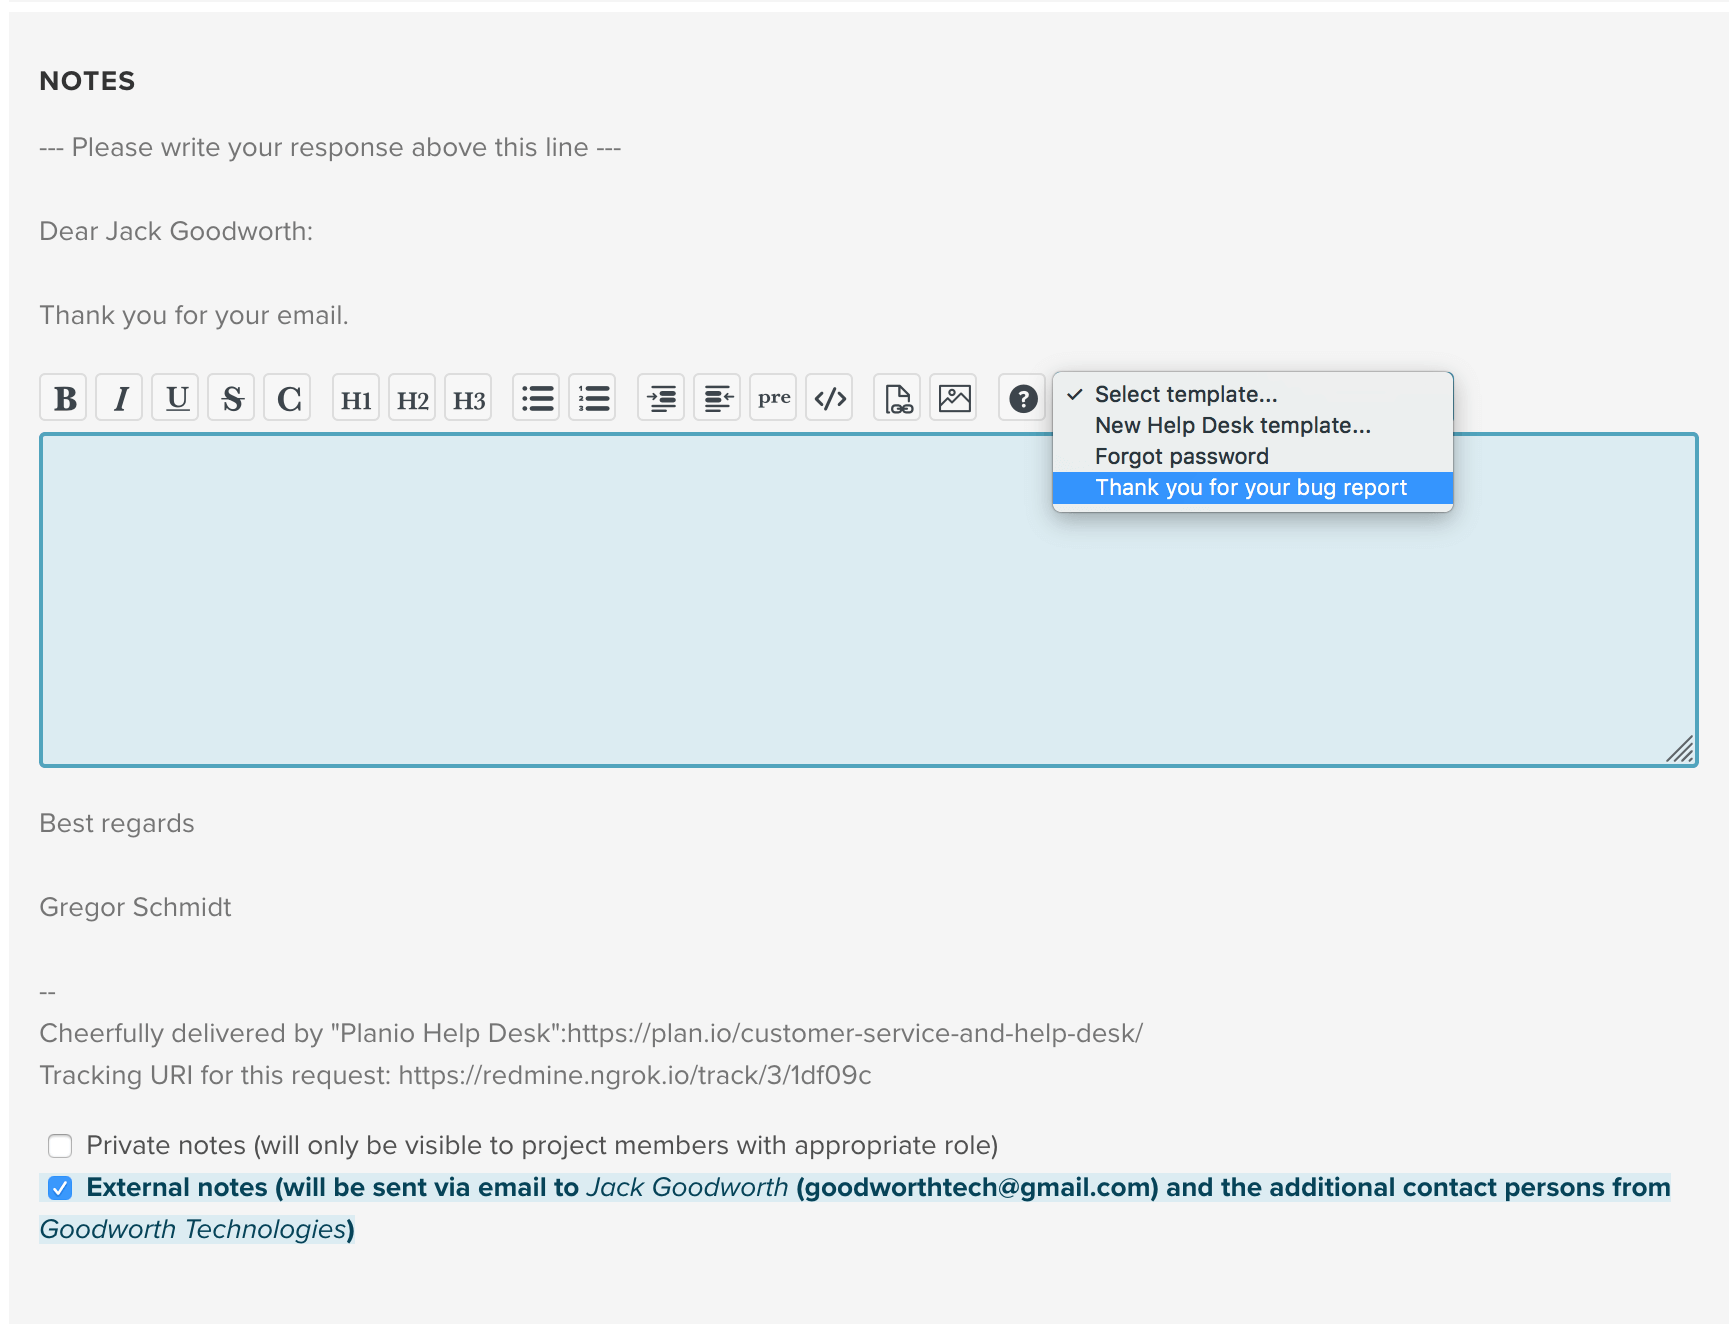
メールの文頭や文末に挨拶文を書く必要はありません。これらの内容はヘッダーとフッターテンプレートで自動的に反映されます。 あとでテンプレートを更新する方法について説明しますね。
送信ボタンをクリックして送信してください。
挨拶文と署名が書かれているメールが相手に届きます。 おまけに顧客は追跡用リンクを取得できます。それで進捗状況を確認できるようになります。 チケットをすぐに解決できない場合は特に役立ちます。たとえば、その問題が解決されるまでの間、チケットを最新の状況に保つことができ、顧客はひとつのページで対応状況の履歴を見ることができます。
それでは、ヘルプデスクのより高度な機能を見ていきます。
プロジェクトメニュー「設定」で「Help Desk」タブをクリックしてください。
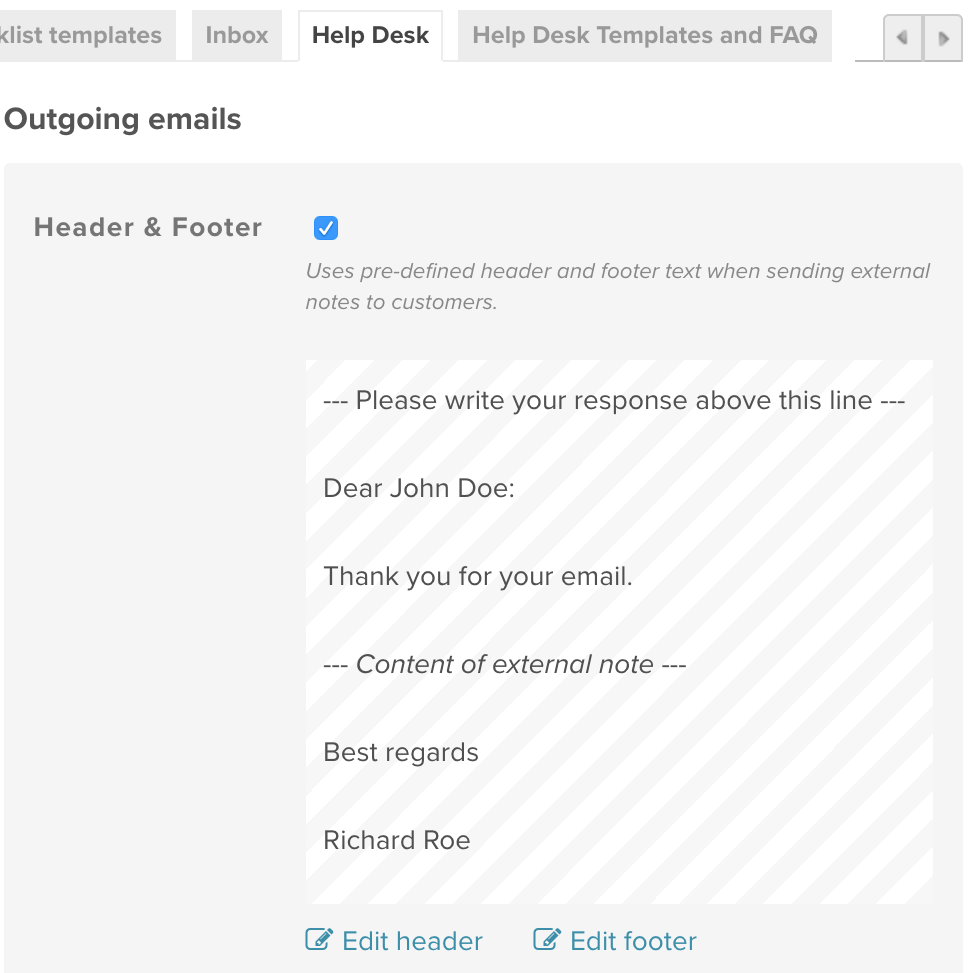
右側に「送信メール」のセクションが表示されます。ここで、ヘッダーとフッターの既存のテンプレートを更新できます。試しにフッターを更新してみましょう。その下の「フッターを編集」をクリックします。
「Best regards」と current_user.name(現在のユーザー名)が波括弧の中に表示されます。
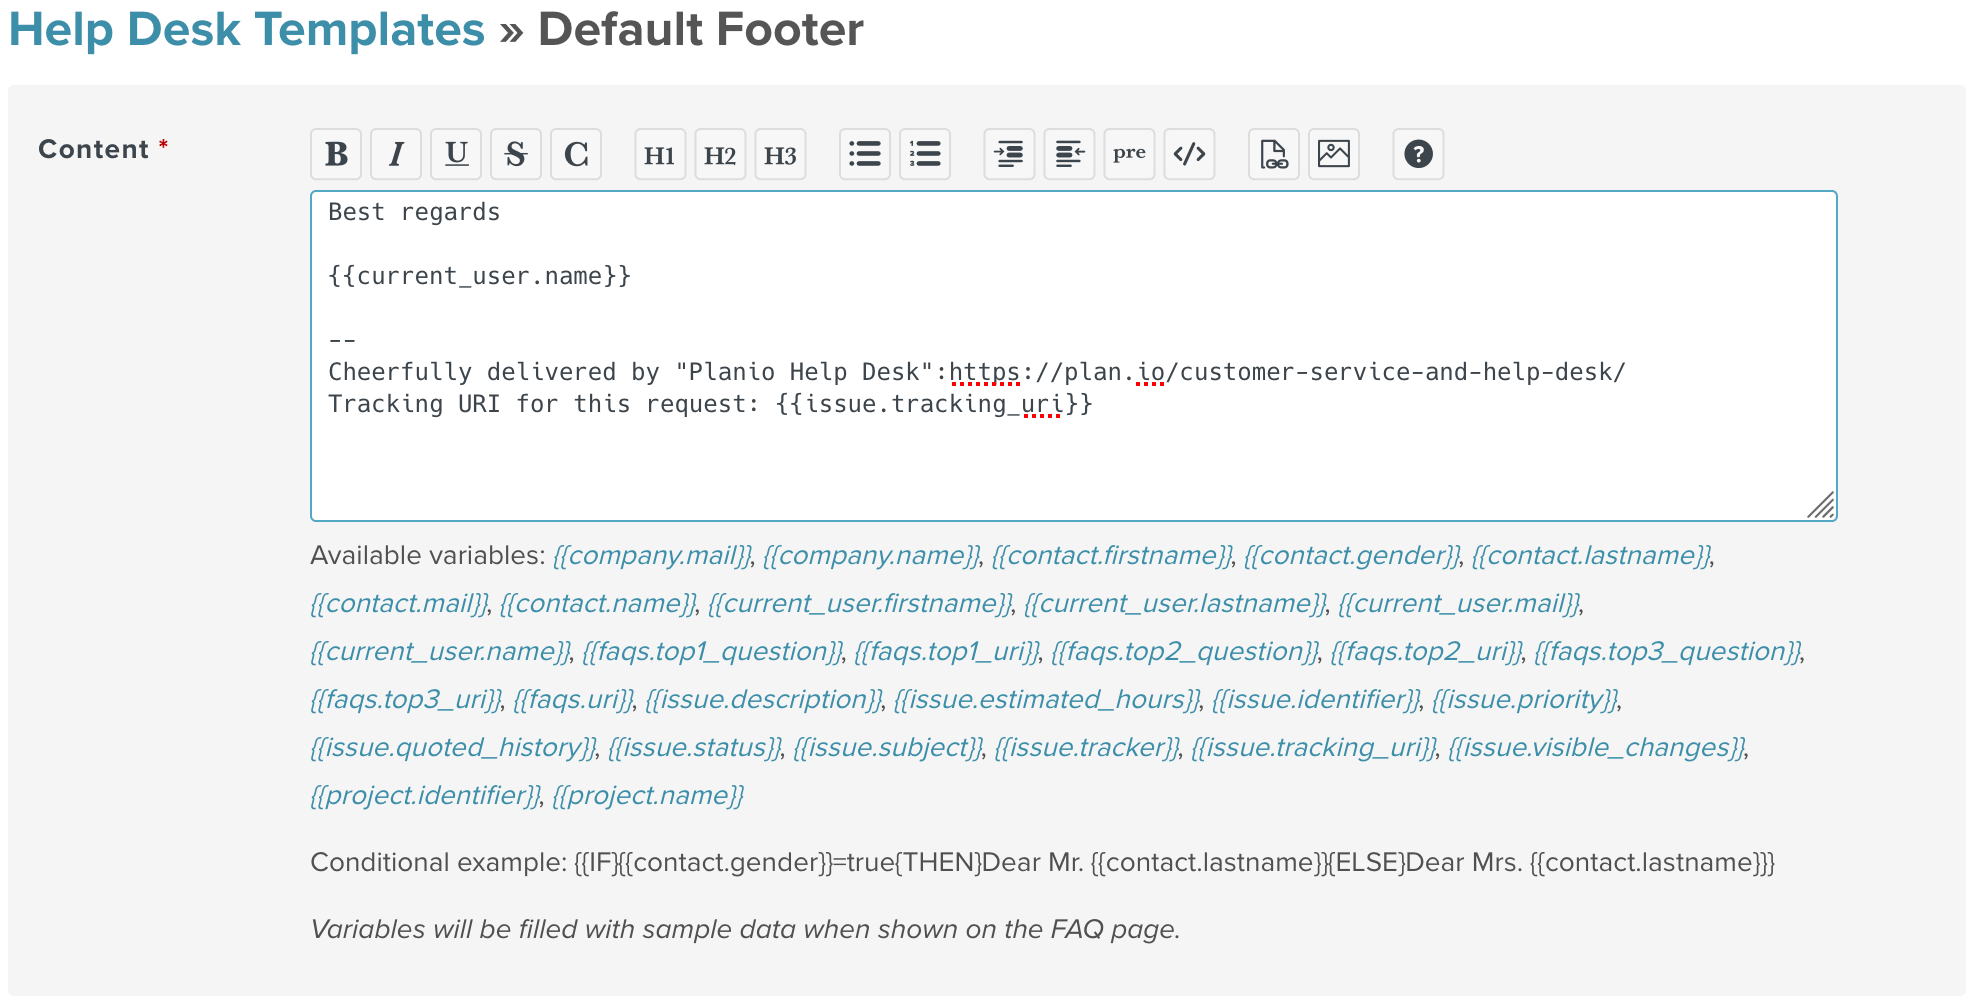
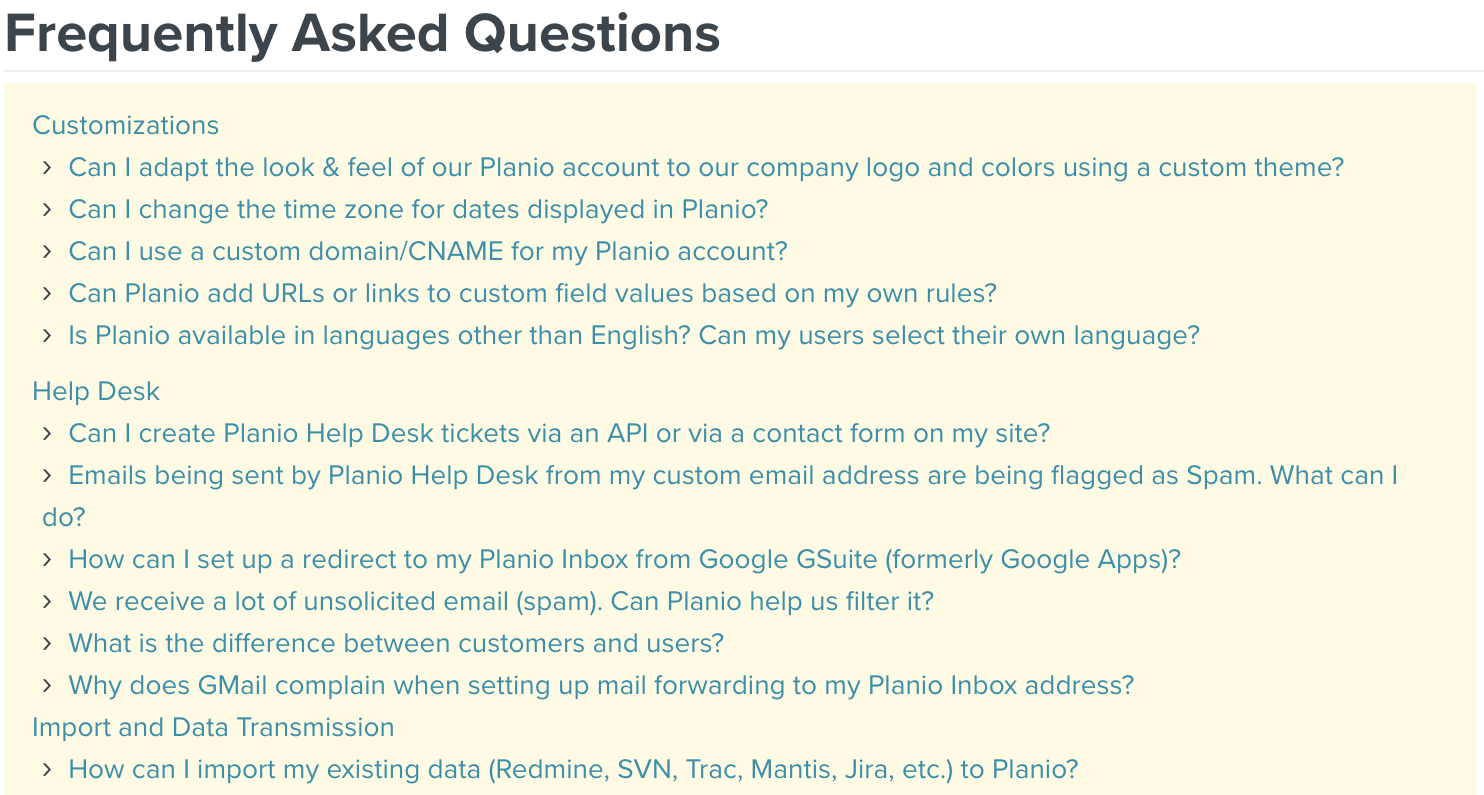
ここで表示される名前は、回答者によって変わります。テキストを自由に変更でき、選択できる変数のリストがあります。例えば、プロジェクト名を名前の後に置くことができます。また、{{faqs.top1_question}} 、{{faqs.top1_uri}} などの変数を使用して、最もよく問われる質問へのリンクを含めることもできます。
よくある質問に対する回答テンプレートを作成することもできます。顧客のメールに返信する際に回答用のテンプレートがドロップダウンメニューに表示されます。
プロジェクトの設定「Help Desk templates and FAQs」を利用して、回答用テンプレート、もしくは公開されるFAQを作成し、編集することができます。 これで顧客がよくある質問の回答を自力で早く見つけることができます。 また、顧客がサポートをリクエストする際に自動応答メールを送信する場合、よくある質問へのリンクを含めることができます。
Planio Storage lets you set up a dedicated folder within any Planio project that will be synchronized across your team. All team members can access files using the web or directly on their devices using the Planio Storage Sync Client.
Within any project, install Planio Storage by navigating to the Apps tab. Depending on your current Planio plan, you might have to add Planio Storage for a small monthly fee. Of course, you'll be able to try Planio Storage for free until your next plan renewal.

To sync your project's files and folders with your computer, download the appropriate client app first.
|
macOS Download (Version 2.6.3) |
Windows Download (Version 2.6.3) |
Linux Download (Version 2.3.4) |
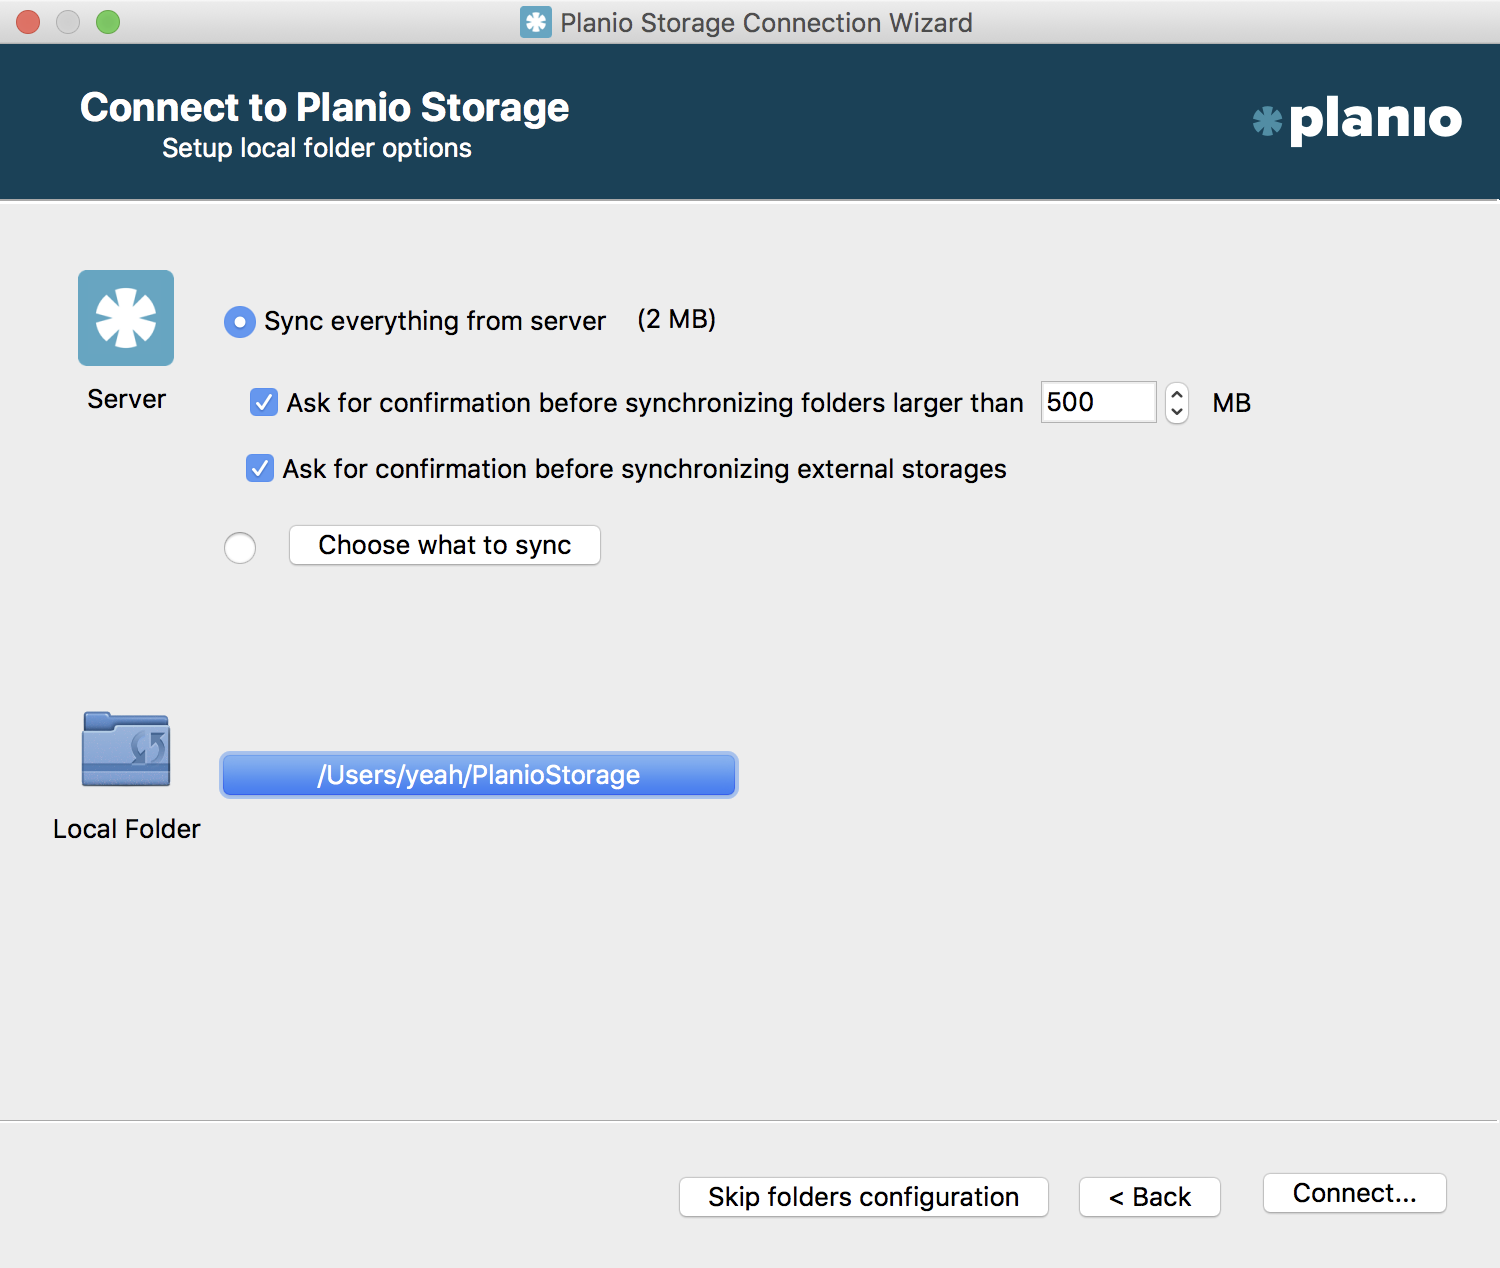
Next, run the installer and enter your Planio domain, login and password. Planio Storage will allow you to sync everything from your Planio account or just the projects you select.
You can also specify the local folder where Planio Storage files should be placed.
Handling files and folders inside the synced folders works like you're used to and every change will be synced with Planio. Should you be offline during a change, the sync will happen the next time your device is connected to the Internet.
In case you and a colleague edit the same file while offline or during syncs, Planio Storage will create a copy of the file and you'll be able to merge your changes.
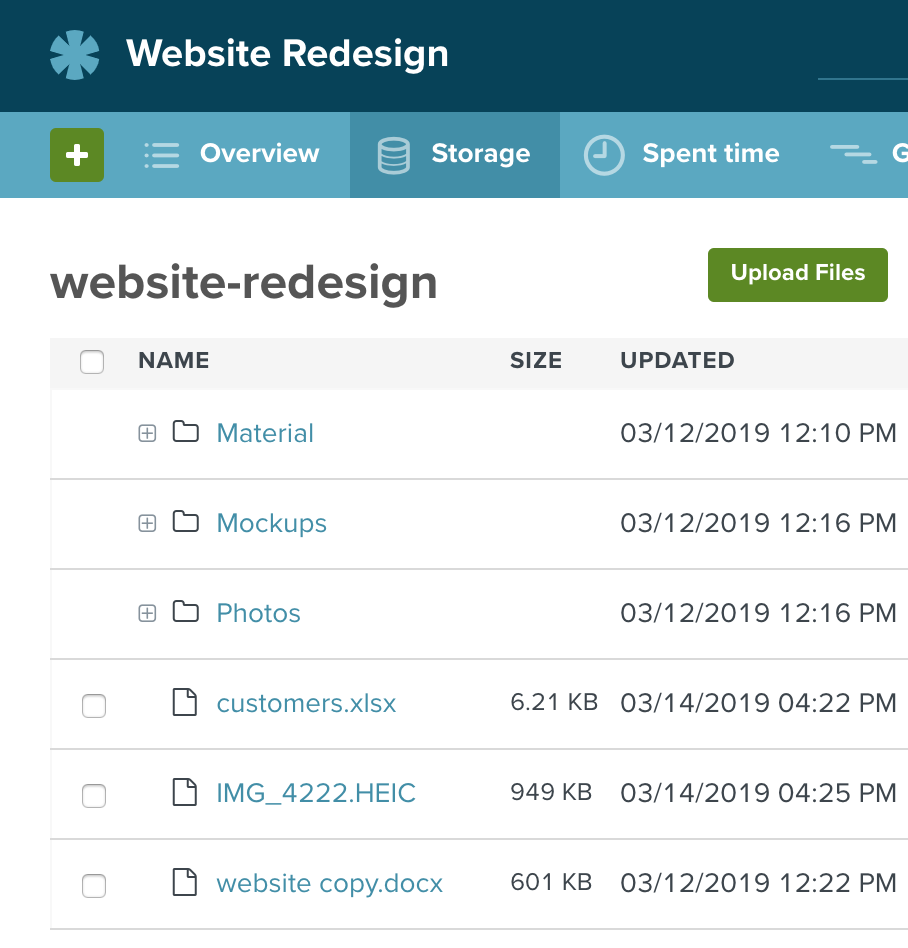
You can manage files and folders right in Planio as well. Within your project, navigate to the Storage tab. Inside, you'll be able to upload any number of files from your computer by clicking on the Upload files button or simply by dragging them from your desktop into the browser window.
You can also create folders as you would on your computer by clicking New folder.
To visualize the files and folders in Planio Storage, you can either select Tree or Grid from the options menu at the top right.
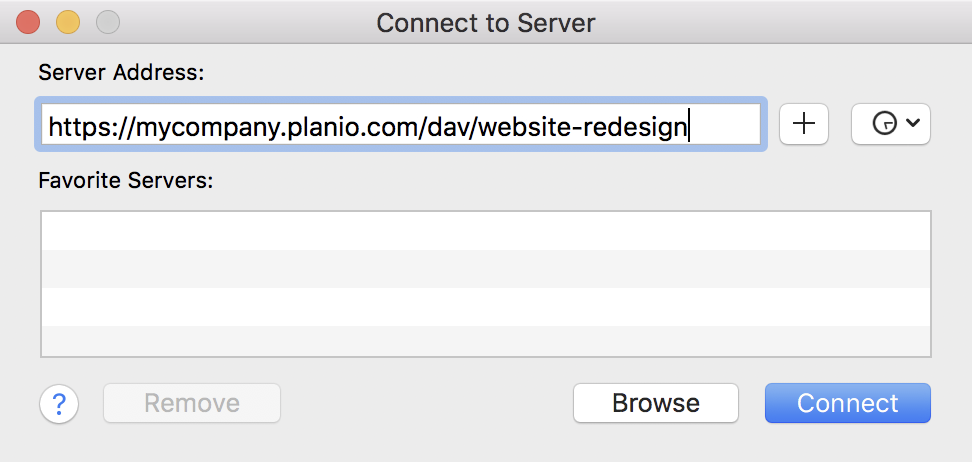
In case you don't wish to synchronize everything but access Planio Storage directly while online, you can use WebDAV.
You can find a project's WebDAV URL in the Storage section's sidebar on the right. To connect, simply use your Planio login and password.
To configure who among your colleagues and clients should be able to view and edit files, head to your avatar -> Administration -> Roles and Permissions. Then, select a role. Within Permissions -> Storage, you'll be able to set permissions for the selected role.
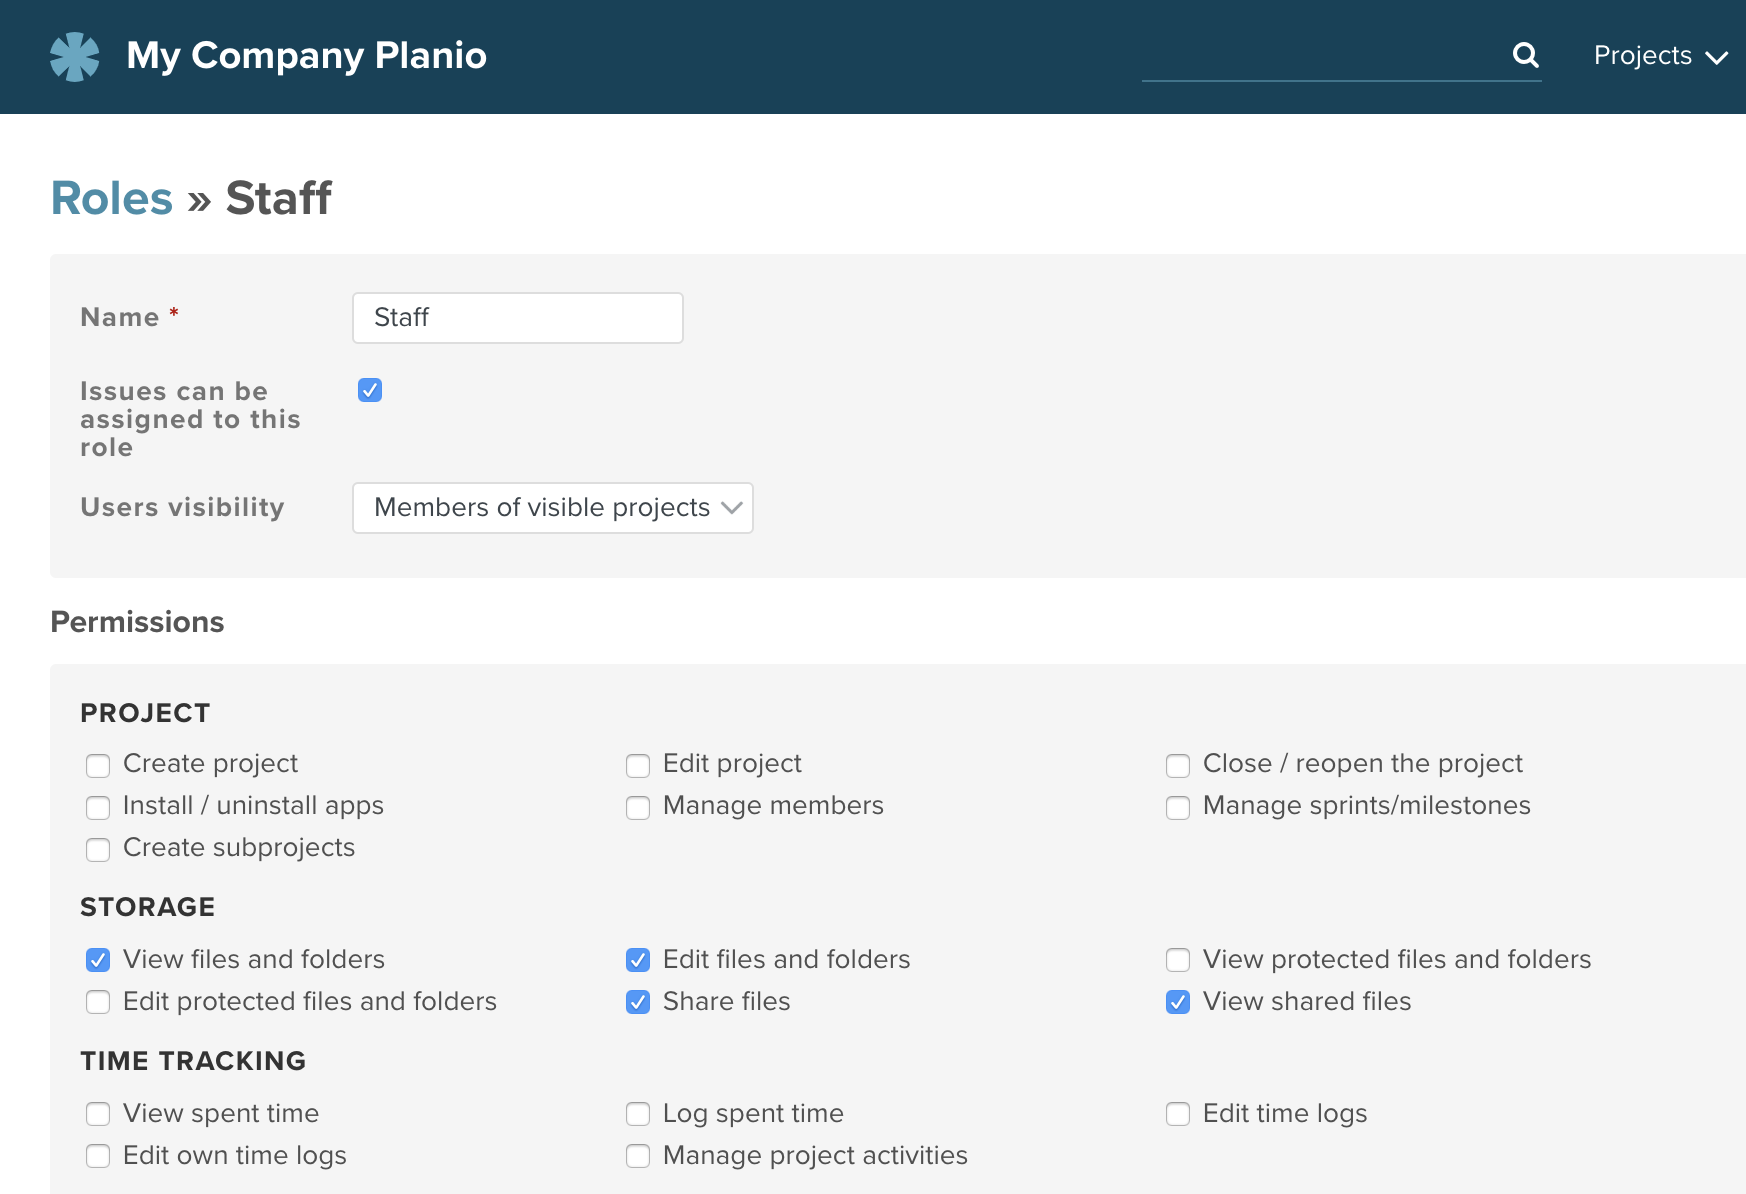
The following permissions are available:
| View files and folders | Enables users to access the Storage tab and browse files. |
| Edit files and folders | Lets users upload, edit, and delete files. |
| Edit protected files and folders | Enables users to protect files and folders. Protected items are hidden from other users unless they have the View protected files and folders permission. |
| View protected files and folders | Allows users to view and download protected files. They cannot edit, delete, or set files to unprotected. |
| Share files | Allows users to generate a sharing link for any file. |
| View shared files | Allows users to download files shared using a sharing link. |
Files and folders can be protected and thus hidden from other users. To protect a folder or file, click on the ... menu or right click the item. Then, select Protect.
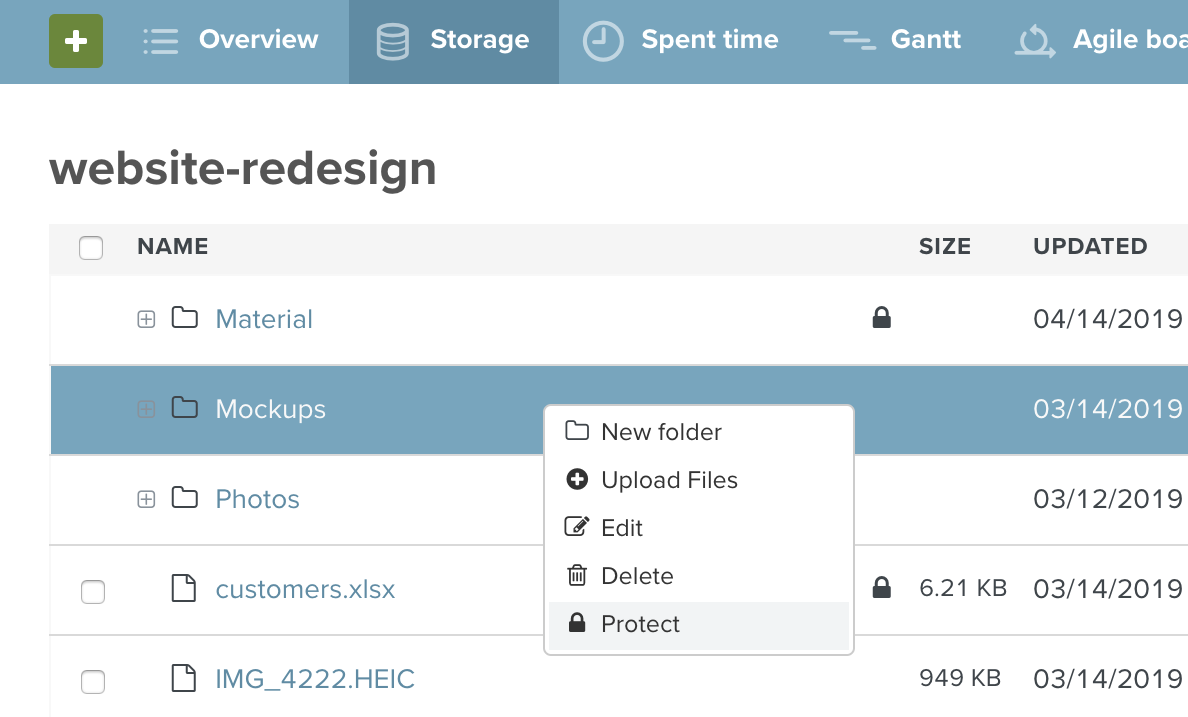
Protected files and folders are hidden from users who do not have the View protected files and folders permission. Users who do have the permission can view and download protected items, but they cannot edit or delete them.
To edit, delete, or unprotect protected files and folders, users need the Edit protected files and folders permission.
Single files can be shared with people outside of the project by generating a Sharing link. This is useful if you'd like to link to the file publicly or send a link to it in an email.
To share a file, click on the ... menu or right click the item. Then, select Share. You'll be able to copy the sharing link in the next step.
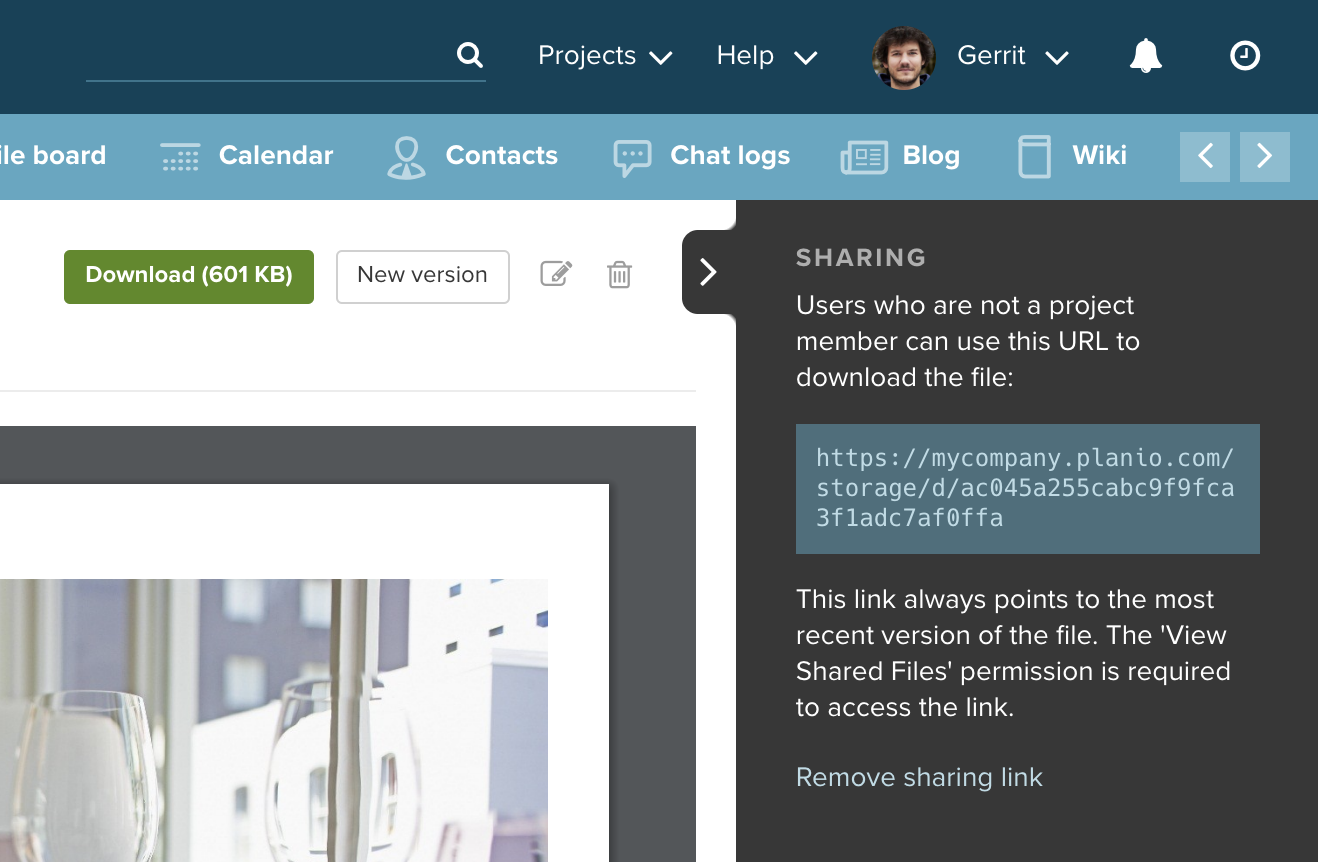
The link will always point to the latest version of the file–even if it has been updated after it was shared.
Sharing links can be accessed by anyone who has the View shared files permission. By configuring your Non-member and Anonymous roles, you can define if that extends to everyone who has an account in your Planio or even to people who are not logged in. Our guide Make Redmine Projects Public on Planio has more information about this.
You can create links in Planio Storage which point to files in different folders or even projects of your Planio account.
To create a link, click on the ... menu or right click the item. Then, select Create link. In the popup that appears, select the project and folder where the link should be created.
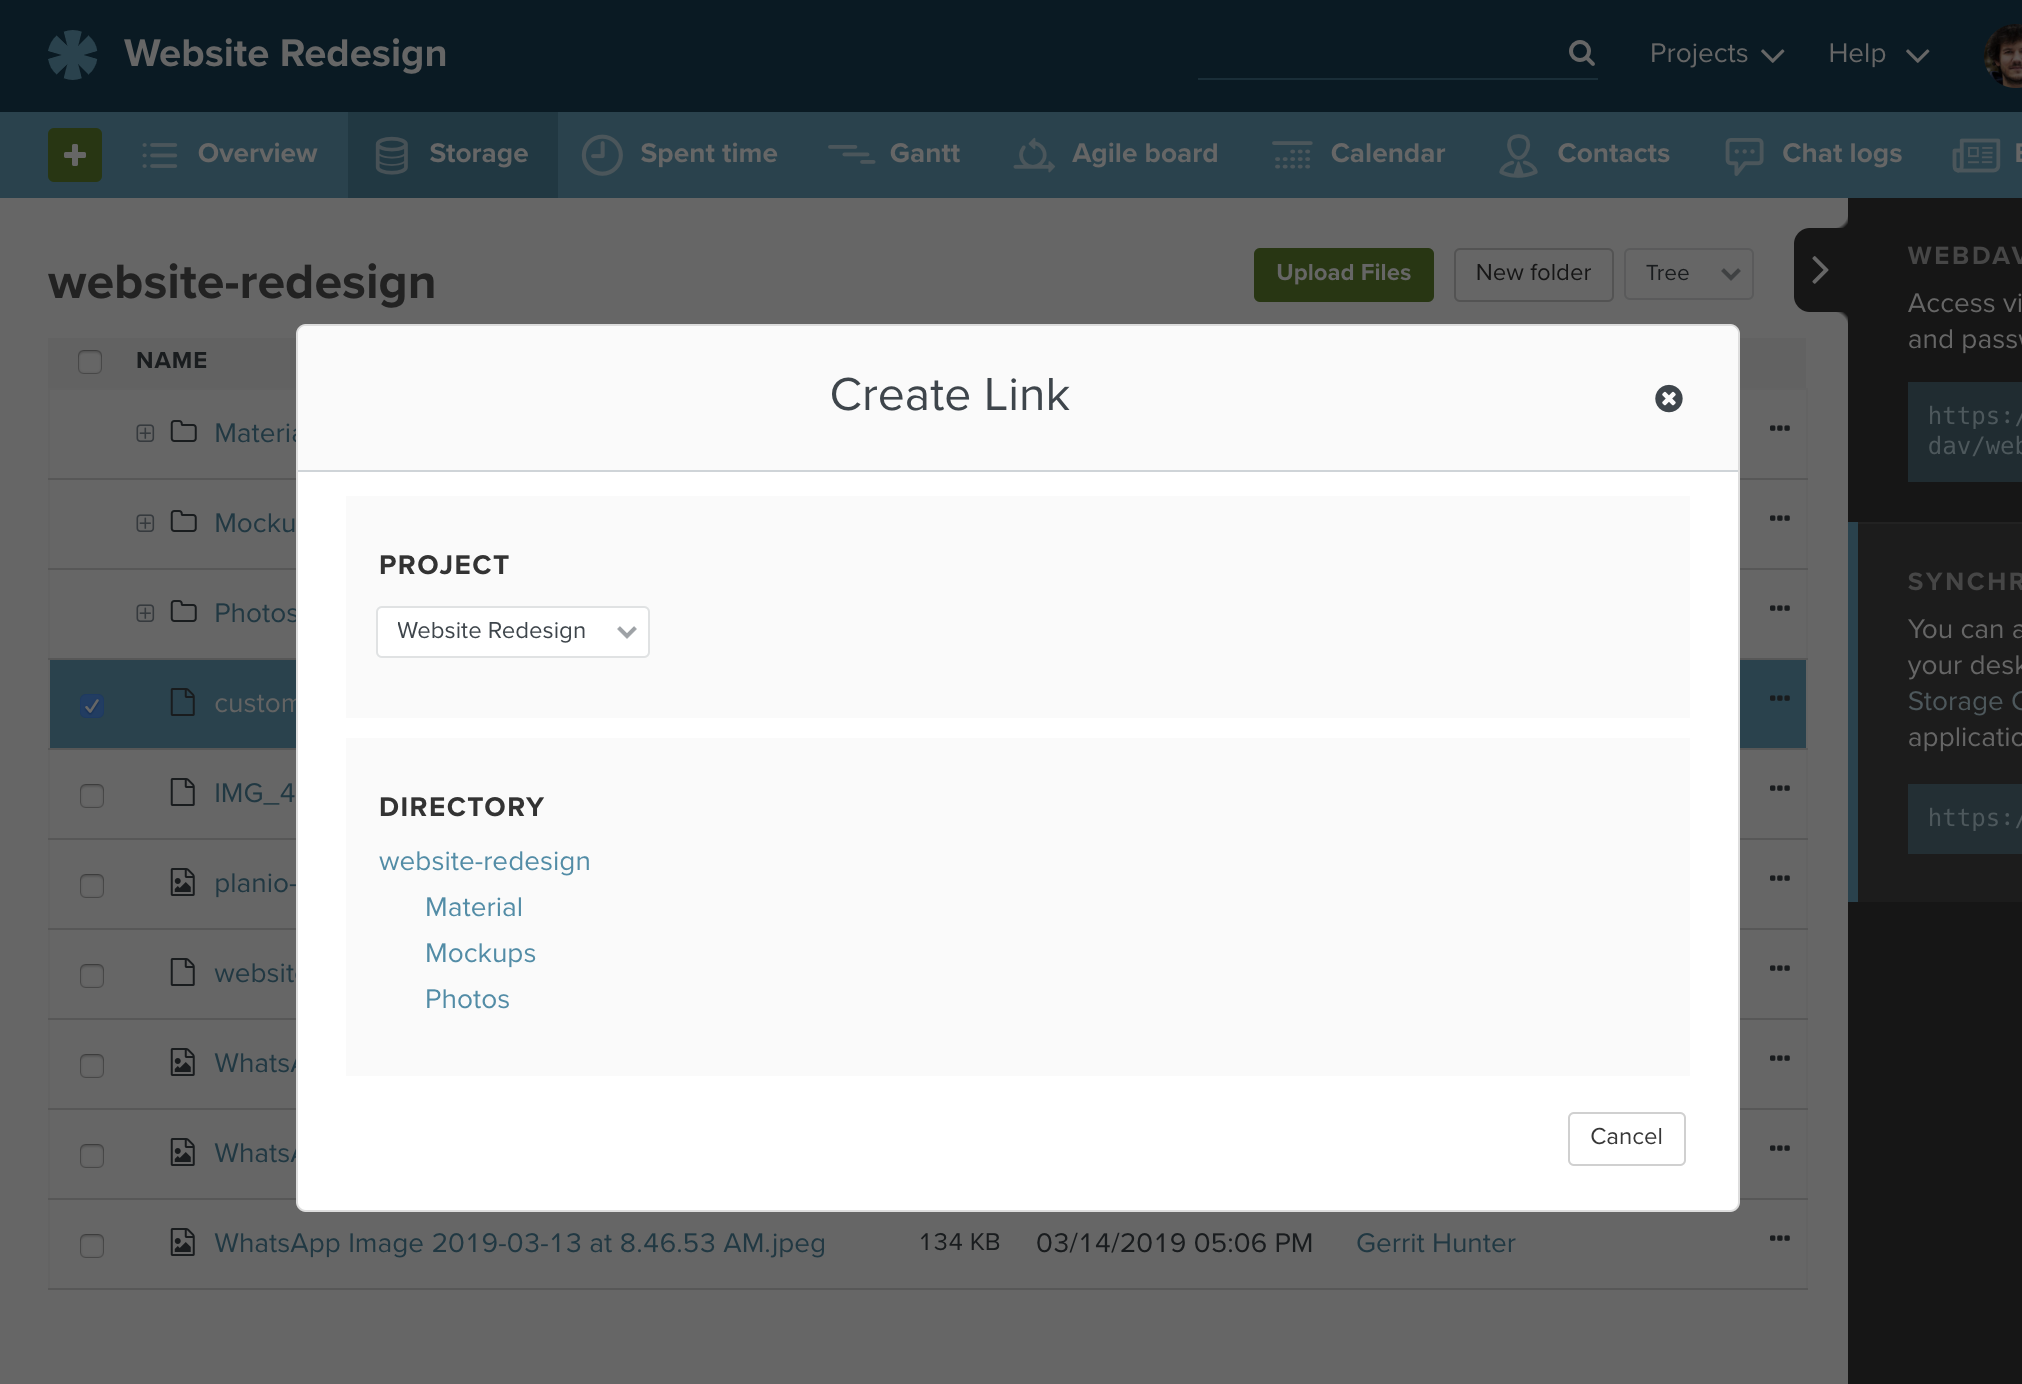
Links will always point to the latest version of the source file. If a source file is deleted, all links will disappear as well.
Users will always require permissions to view the source file as well in order to be able to view the link.
The Planio Storage desktop client uploads local changes and downloads remote changes. When a file has changed both in your local folder and on the Planio server between two synchronization runs, the client will be unable to resolve the situation on its own. Therefore, it will create a conflict file which contains your local version, download the remote version from Planio, and notify you that a conflict has occurred which needs attention.
Imagine there is a file called hello.txt in your synchronized folder. It has not changed for a while and contains the text "hello" both on your PC and remotely, on the Planio server. Now, nearly at the same time you update this file to say "local hello", the file on the Planio server gets updated to contain "planio hello" by someone else.
When attempting to upload your local changes, the desktop client will notice that the server version also has changed. It therefore stops the upload (since it would potentially overwrite somebody elses changes) and instead creates a conflict file holding your local changes. You will now have two files on your local machine:
hello.txt containing "planio hello"hello (conflicted copy 2020-06-03 012755).txt containing "local hello"As you can see, the file hello.txt represents the file as it is currently on the Planio server - it has the remote changes (and will continue to be updated with further remote changes when they happen), but your local adjustments have not been uploaded to the server. Instead, the conflicted copy file holds your local adjustments now.
The desktop client notifies you about this situation via system notifications, the system tray icon and a yellow unresolved conflicts badge in the account settings window. Clicking this badge shows a list that includes the unresolved conflicts and clicking any one of them opens an explorer window pointing at the relevant file.
To resolve such a conflict, open both files, compare the differences and copy your local changes from the conflicted copy file into the original file where applicable. In this example you might change hello.txt to say "local and planio hello" and delete the file with conflicted copy in its name. With that, the conflict is resolved.
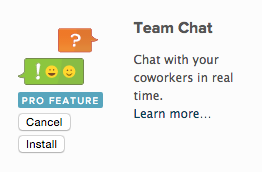
チームチャットを利用すると、スマートフォンやパソコンからリアルタイムでチームのメンバーと一緒に速やかに意思決定ができます。
プロジェクトの最新情報をどのデバイスからでも入手できますし、チームメンバーと話したい場合は直接連絡を取ることも可能です。
Planioのアカウントにログインし、チームチャット機能を利用したいプロジェクトを選択してください。
ナビゲーションバーの モジュール タブに移動し、 チームチャット はインストール済みであることを確認してください。これはオプションの追加機能のため、使用するにはアップグレードが必要です。
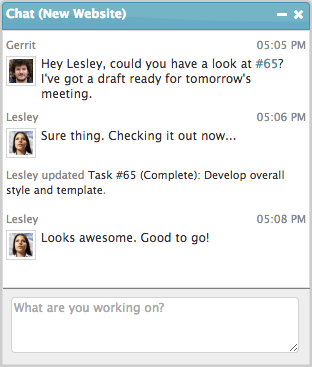
インストールが完了すると、画面の右下にチャットタブが表示されます。ここからチャットを開始できます。
また、ナビゲーションバーに チャットログ タブがあります。これをクリックすると、すべてのチャットメッセージの履歴が表示されます。右側にはチャットのクレデンシャル情報が記載されているサイドバーがあります。 サーバーパスワード を確認するには、アカウントのパスワードを入力する必要があります。
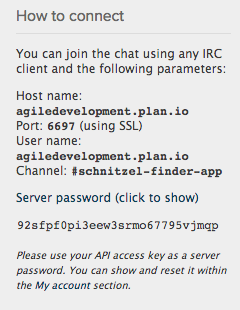
これらの情報はモバイルデバイスやデスクトップのIRCクライアントでチャットを設定するために必要です。
以下からプラットフォームを選択してください:
 |
 |
| Colloquy for iOS | AndroIRC for Android |
 |
 |
| Colloquy for Mac | Pidgin for Windows |