
Using Team Chat in Planio » History » Revision 14
« Previous |
Revision 14/60
(diff)
| Next »
Thomas Carney, 07/08/2015 04:56 PM
Get Started with Team Chat in Planio
Team Chat lets you quickly make decisions together with your teams in real time from your phone or computer.
- Table of contents
- Get Started with Team Chat in Planio
How Can You Use Team Chat?
- You can chat with your team members directly inside Planio, on desktop clients or on your mobile about a project.
- You can discuss an issue in chat, and your chat will be easily accessible from that issue, so you’ll have all the discussion around the issue in one place.
- You can ping people by writing their name, so you can quickly ask them a question. They’ll get a notification, so they’ll know about it straight away.
- You can search the entire chat log using search. Everybody can simply look up what has been said on a subject and absent people can catch up on past chats easily.
Activate Planio Chat and Get Your Planio Chat Credentials
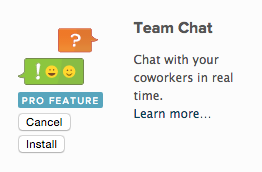
Log in into your Planio account and select the project for which you want to enable team chat. Go to Apps in the navigation bar and make sure Team Chat is installed. It’s an optional extra, so you’ll have to upgrade to use it.
Now, you’ll see a Chat tab in the bottom-right of the screen. You can start chatting here.
You'll also find Chat Logs in the navigation bar. Click on it, and you’ll see a history of all chat messages. On the right, you’ll see a sidebar with chat credentials you'll need to set up chat on mobiles or desktops. You’ll have to enter your password to see the Server password.
You'll find your chat credentials on in this sidebar
You’ll need these credentials to set up chat on mobile devices and desktop IRC clients.
Set up Chat on your iPhone
Let’s install chat on your iPhone so you can chat with your team members and get notifications on the go.
Install the Colloquy App from the App Store
Open the app store and search for the Colloquy app. The app costs 1.99. Install the app and open it.

Add a new Connection
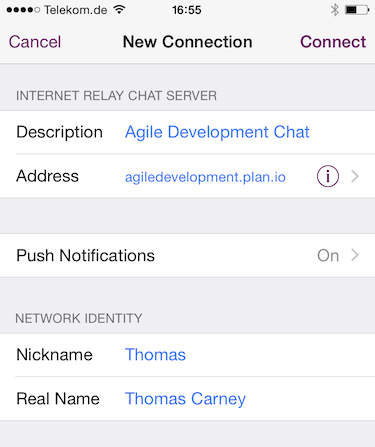
Select ‘Add an IRC connection'.

Now, we'll fill out the connection fields:
- The Description can be whatever you want.
- The Address is the Host name from your Planio chat credentials (see above).
- Switch on Push Notifications if you want to be notified when someone mentions your name in chat.
- Nickname and Real Name will show up as your name in chat.
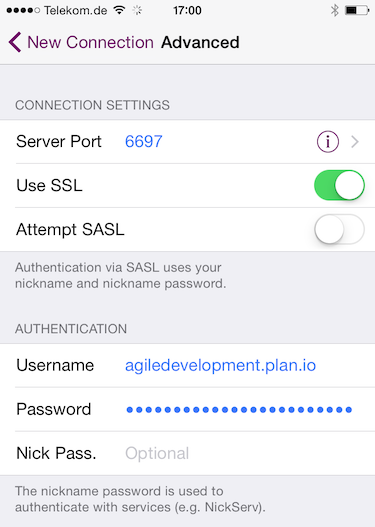
Scroll down and select Advanced

Here's we'll fill out the connection and authentication settings with our Planio chat credentials (see above):
- Enter the Server Port.
- Switch on SSL, so your chat will be secure.
- Enter the Username
- Enter the Password
Click back to New Connection and then click on ‘Connect’
Join the Project Room
You’ll see two rooms. You can enter the room and start chat
[insert screenshot of chat room]
Set up Desktop Chat on your Mac
Download and install Colloquy
Download and install Colloquy from the Colloquy downloads page.
Create a new connection
Open up Colloquy. It will prompt you to create a new connection. If not, you can select File -> New Connection
[insert shot of the open prompt]
Select the Details button and enter the following details:
[insert shot of the new connection screen filled out]
You'll find these credential details on in your Planio project in 'Chat logs'.
Nickname: enter your name
Server Protocol: leave as IRC (Internet Relay Chat)
Chat Server Port: see your Planio account
SSL Connection: make sure it’s ticked (so your chat will be secure)
Chat Server: enter the Host name
User name: enter the User name
Server password: enter the Server password
Join the Project Room
Click on Connect and you’ll be automatically joined to your project chat room.
[insert screenshot of the chat room]
Updated by Thomas Carney over 9 years ago · 14 revisions