
Import issues into Planio via CSV files » History » Revision 73
« Previous |
Revision 73/79
(diff)
| Next »
Thomas Carney, 09/13/2016 01:15 PM
Import issues into Planio via CSV files
This is a guide on how you can import tasks, issues, tickets or stories from Comma Separated Values (CSV) files using the importer in Planio. You'll be able to move data between different software packages easily. For instance, you could plan a project in Microsoft Project, and then you could import all the tasks into Planio as issues.
- Table of contents
- Import issues into Planio via CSV files
There are two steps to this process. First, you need to prepare a CSV file for import. Second, you have to carry out the import. We’ll cover both in this guide.
Preparing the CSV file
You need to export your tasks, issues or tickets in the CSV format. You can save most Excel sheets as CSV files by clicking on File -> Save As… and then selecting Comma Separated Values as the format from the drop-down menu.
Your CSV file can have the following headers. You’ll find a sample CSV file here: example.csv.
| Values | Notes |
|---|---|
| Subject | The subject of the issue. This is required |
| Description | Enter the text describing the issue. |
| Priority | Enter the name of one of the priorities listed in your Planio account. You’ll find their names in Administration -> Enumerations |
| Assignee | Enter the First and Last Name, login or email of the person to whom you want to assign the issue. You’ll find those details in Administration -> Users. Make sure the person is a member of the project before assigning them issues via the importer. |
| Sprint/Milestone | Enter the name of the milestone or sprint to which the issue should be assigned. |
| Private | This selects whether the issue will be private for the assignee or not. Enter TRUE or FALSE as possible values. |
| Parent task | You can enter the line number of another issue in your CSV file to specify it as a parent task. |
| Start date | Enter the date in your local date format (e.g. MM/DD/YYYY or DD.MM.YYYY). |
| Due date | Enter the date in your local date format (e.g. MM/DD/YYYY or DD.MM.YYYY). |
| Estimated time | Enter a number for the estimated number of hours (e.g. 15). |
| % Done | Enter a number for the percentage done (e.g. 27). |
Importing the CSV File
Now, you have a CSV file ready for import. The next step is to import it into Planio. You’ll find the button for the Import on the issues page in the sidebar.
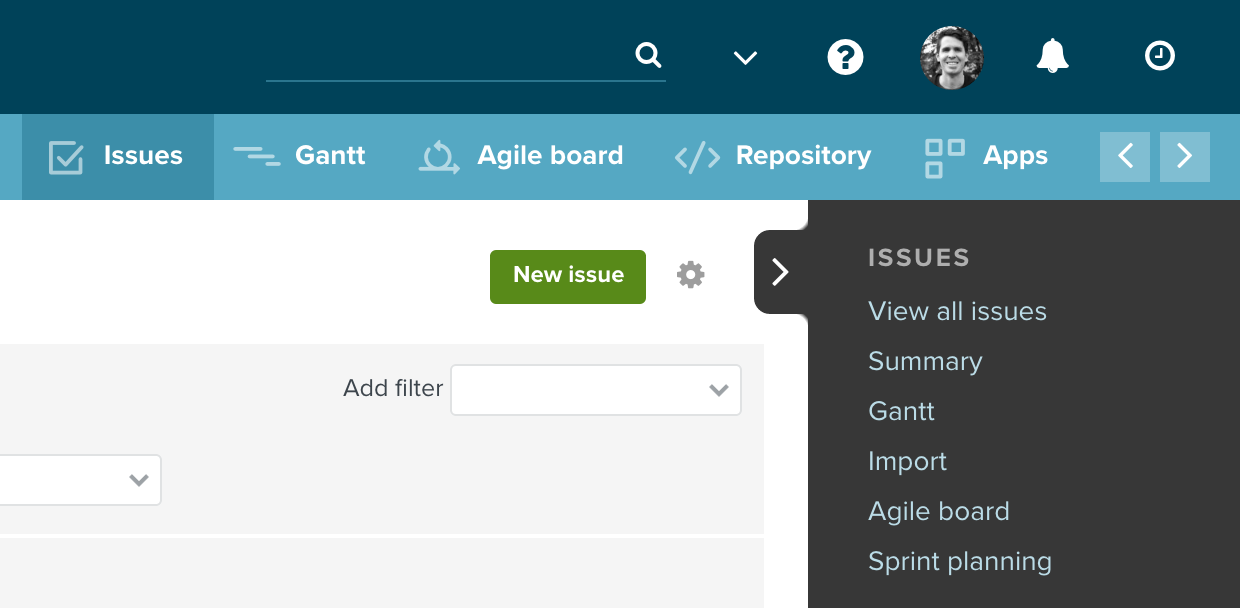
Click on Import in the sidebar on the right
Then, select your CSV file using the file picker.
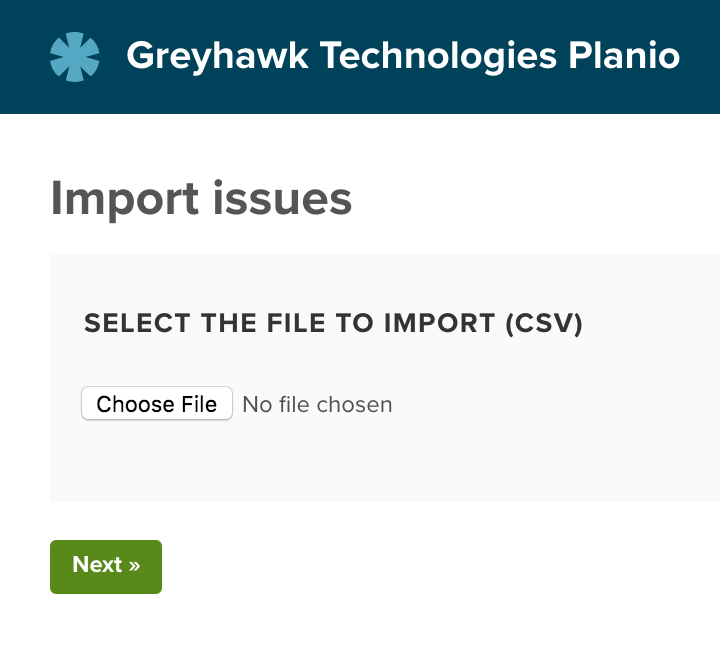
Upload the CSV file using the file picker
On the next page, you can select options for importing the CSV File
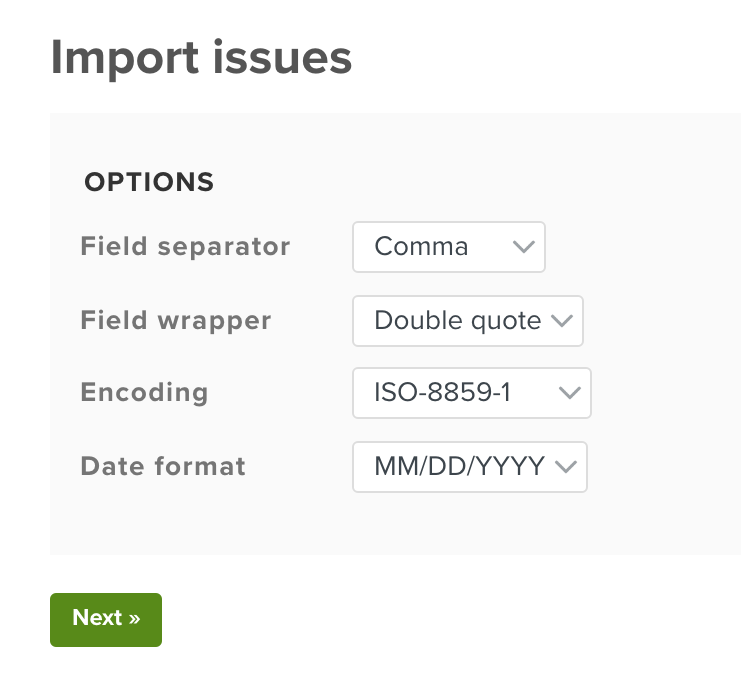
Select the options for importing the CSV file based on how your CSV file is formatted
| Option | Notes |
|---|---|
| Field separator | You can select between comma separated values or semicolon separated values |
| Field wrapper | You can select between double quotes or single quotes. |
| Encoding | You can select the encoding for the CSV file |
| Date format | You can select one of five date formats (YYYY-MM-DD, DD/MM/YYYY, MM/DD/YYY, DD.MM.YYY or DD-MM-YYYY) |
Then, you have to map the values from the CSV files to issue fields in Planio. You can select each value from the drop-down menu beside each attribute. You’ll also see a file content preview further down, so you can make sure you’re importing the right data.

Assign each column in the CSV file to an issue field
Once you’re done assigning the values to each field, you can click on import to start the import.
If you encounter any issues, you'll see a page with the errors and the import will not be carried out. You can restart the import once you've fixed the problems in the CSV file.

A list of the errors encountered during the import
If all goes well, you’ll see a list of the imported issues.
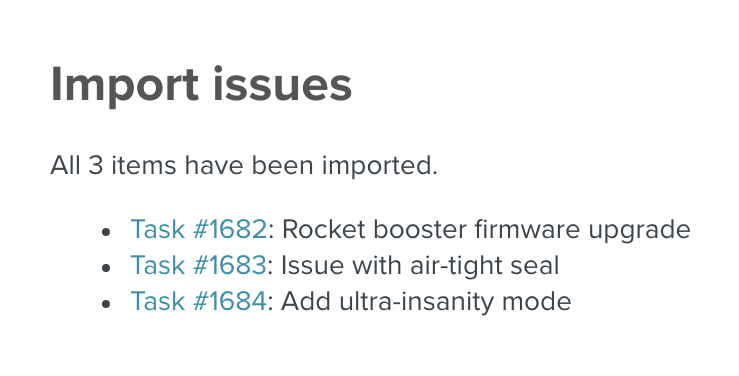
You'll see a list of the created issues.
That's how you can import tasks, issues, bugs or stories into Planio using the CSV importer.
Updated by Thomas Carney over 8 years ago · 73 revisions